Jolly Homemade Recipes

  • Home
  • About & Connect
  • Recipe Index
    • Cuisines
      • North Indian Cuisine
      • South Indian Cuisine
      • International Cuisine
      • Regional Indian Cuisine
    • Baking
    • Breakfast
    • Beverages
    • Curries & Lentils
    • Healthy Recipes
    • Kids Recipes
    • Rice Recipes
    • Vegan
  • Collaborations
  • Privacy Policy
  • Contact Us
Kurkuri Bhindi or Bhindi Fry Recipe - In Hindi, Kurkuri means Crisp and Bhindi is Okra. This Bhindi Fry recipe is an easy snack like recipe made with Bhindi or Okra (Lady Finger). The fried bhindi recipe offers a crispy texture and a great welcome snack in you small get together of family or friends dinner / lunch meal. This is so simple to make and tasty dish.

The kurkuri bhindi offers you a crunchy and tasty twist to a typical bhindi (lady finger) fried recipe. The spices just blends with the bhindi or lady finger which is deep fried to impart a golden look and a crispy (kurkuri) texture. At my home, we generally had this as a side dish with the combination of dal, sambar, rice with any curry or even with plain chapatis or parathas.

Ingredients
 

Bhindi / Lady finger - 100 gm
Besan / Gram Flour - 25 gm (almost 2 tbsp)
Red chilli powder - 1/2 tbsp

Garam Masala - 1/2 tbsp
Dry Mango /
Amchur powder - 1/2 tbsp
Chaat masala - 1/2 tbsp

Salt to taste
Oil for deep frying

Tip :- You can adjust your dry spices powder according to your taste.

Preparation Method

1. Wash the lady's finger(bhindi) well. Leave it to dry.


2. Using a sharp knife, first cut off both ends and then slit vertically just like in the below image.

3. Dust the bhindi well with besan and marinate with chilly powder, garam masala, dry mango powder, salt to taste and keep it aside for 1/2 hr.

4. Heat a oil in a kadai/wok, put small portions of marinated bhindi and fry it on a medium flame and separate the bhindi strings with the help of spoon.

5. Keep turning over and take out when golden brown and crispy.

6. Serve kurkuri bhindi hot as a starters, sprinkle with lots of Chaat masala on the top.

Khaman Dhokla is a vegetarian and popular snack from Gujarat. This is my second trial experience to make khaman dhokla at home, got success this time. This is an easy and quick gram flour/besan cake recipe. This is a very famous snack of Gujarat but now-a-days it is popular all over India.

Khaman Dhokla can use as breakfast, evening tea-time snacks and you can serve as a starters in your small get together party. There are many kinds of dhokla, but this is one of the most popular. 

Soft and mildly sweet-salty-tangy khaman dhokla tastes delicious with tamarind chutney and green coriander chutney. Its my all time favorite snack in all season. 

Follow this recipe and discover how easy it is to make mouth watering traditional khaman dhokla prepared at home. With very easy step by step photo process of khaman dhokla.

Ingredients :

Gram Flour / Besan - 1 cup
Sooji - 1 tbsp
Sugar - As required
Ginger-chilli paste - 1 tbsp
Eno Lemon - 1 packet
Curd - 2 tbsp
Oil - 2 tbsp
Salt to taste
Water

For Tempering

Mustard seeds - 1 tsp
Slit Green chillies - 2 nos
Curry Leaves - 5 - 10
Chopped Coriander leaves - 1 tbsp
Oil - 2 tbsp
A pinch of Hing
Water - 1/2 cup
Sugar - 1 tbsp

tbsp = table-spoon
tsp = tea-spoon

Preparation Method :

1. In a deep pan/ kadai, pour 2 glasses of water.

2. Take round plate and add 1 spoon of oil in it. Keep the plate on the pan and allow it to heat.

3. For preparation dhokla, Take a bowl mix gram flour, sooji(semolina) and water. Make it into a lump free thick batter.


4. Add salt, sugar, ginger-green chilli paste and curd.  The below batter pic is little thin add 1-2 tbsp of besan in it, mix well and make it like a thick batter.
Mix well and keep it aside for 1/2 an hour.
5. Add Eno in the batter and stir in one direction, for approx 1 minute. You will notice its size would increase to almost double.
6. After the plate is heated, pour the batter in the plate.
7. Place the plate in steamer and steam it for 15-20 minutes in a low flame.

8. After 15 minute, insert a knife or a toothpick into dhokla, if the knife will come out clean, then its ready. If it is not clean, steam for 5 minutes more.

Direction for Tempering :


1. Heat oil in a kadai/pan, splutter mustard seeds, green chillies, add curry leaves, a pinch of hing and saute for few minutes.

2. Add 1/2 cup of water and sugar, bring to a boil. Let it cook for a minute on a medium flame. Your tempering is ready, pour it over dhokla's and toss gently until each dhokla is coated well with tempering.

3. Garnish with chopped coriander leaves. Your Dhokla is ready. Cut it into 1 inch pieces and serve with tamarind chutney.

Today I am posting my new creation ~ fusion recipe in Food. I am satisfied and really very happy with this new fusion recipe :) :) I got a very good response for this dish from my family and friends. I am bored from regular paratha or bread breakfast, so i wanted to try something new which is tasty as well as easy to make also, today i created this new fusion recipe "Mayonnaise Brown-bread Pizza" sounds new and interesting fusion dish for you friends, I know but if you tried at your home and taste it..I am damn sure you and your family really liked it...its really tasty..yummmm !!
This is best Tea time breakfast dish and very delicious. Those who are a big fan of Pizza's, they love to eat pizza in any form..this is one of the best form, very easy and requires less ingredients to make it, I liked it very much..I hope you also liked it. This is purely homemade bread pizza, No grilling, No baking it's only toasted. This is so simple to make and tasty mayonnaise pizza recipe. Crispy and toasted with lots of mayonnaise & veggies and topped with cheese. Let's start the recipe of Mayonnaise Brown-bread Pizza with easy steps by step process.. 

Ingredients : 

Brown Bread Slices - 8 nos
Mayonnaise - 4 tbsp
Chopped parsley or coriander leaves - 2 tbsp
Cucumber - 1 no
Carrot - 1 no
Tomato sauce - 2 tbsp
Mozzarella cheese
Salt to taste
Black Pepper powder
Butter to fry

Preparation Method :

1. First grate the cucumber and squeeze their water from it, keep it aside in a bowl and now grate carrot and mix it with squeeze grated cucumber.

2. Make Mayonnaise toppings : Take a bowl, add above grated veggies and add 4 tbsp of mayonnaise.(You can make Mayonnaise at home in an easy way, just click the word)

Mix it well, now add salt to taste, black pepper powder, and chopped parsley or those who don't have parsley at home, they can use chopped coriander leaves also.

3. Take brown bread slice, apply a thin layer of tomato sauce on one side of the bread and spread mayonnaise toppings on bread. Sprinkle lots of grated mozzarella cheese as well from top.

4. Preheat a pan or tawa. If you are not using non stick pan, then grease it with little butter and place pizza bread inside the tawa. Cover it with lid or I used small kadai(pan) and cook for 2-4 minutes or until the lower side gets little brown. 

5. Keep checking after every 2 minutes. Very delicious pizza is made. :D

6. Sprinkle some oregano or black pepper powder on top of the pizza. Serve pinning hot pizza and enjoy eating it.

Enjoy & Happy Cooking :)
This is again my new & fusion ( you can try my fusion recipe here )recipe.This is a traditional potato pancake recipe,so here is a simple and quick recipe for a light & yummy comfort food. Aloo Cheela is very delicious dish and liked by every generation. This is pure vegetarian recipe and best time to eat with evening tea.

We love using potatoes as part of our daily cooking because they’re so filling yet so inexpensive. Potato pancakes are a crowd-pleaser wherever we go. Serve with any sauce and sour cream for a light dinner, or with roast chicken for a hearty winter meal.

This is instant snacks recipe or you can have it anytime. In Bangalore, the weather is always pleasant and rain is falling anytime, for that time I am feeling to have it something like pakode's but for making pakode you need to spend more time, but I wanted to make any jhatpat recipe with tea and wanna to enjoy rain also. So, I made this salty potato pancake. Whenever I made this , I never felt that this is made up of potato, because its crispy and very yummy in taste.

Ingredients :

Raw Potato - 2 medium sized

Chopped green chillies - 1 noChopped coriander leaves - 2 tbsp
Salt to taste
Red chilli powder
Black pepper
Chaat masala
Oil

Preparation Method :
1. Take a bowl, grate a raw potato,add all above spices salt, red chilli powder ,green chillies, black pepper, chopped coriander leaves!! Mix all !!!


2. On a hot tawa spread this mixture by hand !! Than put some oil let it cook from one side on a low flame and then change the side with the help of spatula and cook it with little bit oil. Potato Pancake is ready. Sprinkle lots of chaat masala on it and Serve it with tea!!!


Enjoy & Happy Cooking :)
Homemade Masala Layered Paratha | Lachha ParathaLachha Paratha is another variant of popular paratha from North-India, made up from whole wheat flour. Crispy Masala Layered paratha is easy to make at home. It is special variety of regular paratha with flaky layers on the outside and moist in the middle. 

In this paratha, I have just used some simple spices to show you the basic n simple method that how to make lacchedar paratha at home, but you can use your varieties of dry ingredients like carom seeds and many more.

Lachha Paratha is a treat with any meal and can be served with any gravy dish as per as your choice. I usually make the paratha of medium thickness, if you make them more thick then more layers will be visible.... but then you have to cook the paratha really very well. Let's start the recipe, how to make Lacchedar or a Multi -layered whole wheat Paratha with step wise pictures.

Ingredients:

Wheat Flour Dough
Salt to taste
Red Chilly powder
dry wheat flour
Oil / Desi ghee for frying

Preparation Method :

1. Take a dough ball, flatten it slightly by pressing between your palms or against rolling board and coat it with dry wheat flour. Roll it out flat in a circular shape (approx. 7-8 inch in diameter) or as thin as possible. Now spread 1/2 tsp clarified butter aka Desi-ghee evenly over entire surface using spoon or hand  and sprinkle 1 tsp dry wheat flour over it. Sprinkle a pinch of salt and red chilly powder.

2. Hold approx 1/3 inch wide strip with your first two fingers and thumb from the top edge of rolled raw paratha, lift and fold backwards such that top edge remains on top. Now hold two ends of pleated strip and repeat lift and fold backwards process until entire rolled paratha is like a stack of folded pleats (Japanese fan).

3. Roll it like a Swiss roll. Press and stick outer-end against roll’s immediate surface.

4. Place it horizontally on rolling board. Coat it with dry wheat flour and roll it out gently without applying too much pressure and give it a round shape.

5. Heat tawa or griddle over medium flame. Place raw lachha paratha on a hot tawa. When you see tiny bubbles rise on the surface, flip it up side down. Apply little ghee over each side and cook until both sides get evenly golden-brown spots.

6. Transfer it on to kitchen towel. Hold the sides of the paratha with kitchen towel and crumble it gently to highlight the layers. Spread butter or ghee as per your preference. Soft and crispy paratha is ready to serve with curries dish, dry veggies, curd, pickle or tea.
Homemade Masala Layered Paratha | Lachha Paratha
Methi Paratha is a crispy and crunchy Indian bread. It is rich methi flavored paratha recipe with fenugreek leaves, herbs and spices. I have learn this recipe from my Mom. This is one of our favorite paratha dish of my family. Paratha's are made up with differ-differ flavors according to our tastes and Methi Paratha is one of them.

It is a nutritious and yummy Indian even bread arranged utilizing Methi leaves (fenugreek leaves) and other Indian flavors. With this formula extraordinary procedure, planning Methi Paratha is an amazingly  simple assignment; it just requires preparing a dough, using which dough is kneaded and paratha is cooked in a normal way. It's just simple, easy and healthy.
This is healthy as well as tasty delicious paratha. They are great for breakfast and best going with homemade curd, any dry veggie, aloo bhartha and choice of pickle. This is the best time to make this paratha because this is a seasonal veggie & it comes in winters only. The taste of this paratha comes out very well in winters.

This is perfect food to take along for long journey, because it's not sticky and as well as their taste and texture is remain same...crunchy, when it is cold also. It is very nutritious also as well as yummy Indian bread, which is liked by every generation. 

You can make end number of parathas like 

purple cabbage paratha
poha missi roti, 
rice paratha,
poha thepla, 
papad paratha,  
Leftover sambar paratha, lachha paratha
onion paratha and many more.

Let's start to make this quick and healthy recipe of methi paratha with simple step-by-step process.
Ingredients :

Wheat Flour - 2 cups
Finely Chopped Fenugreek or Methi leaves - 1 Bunch
Salt to taste
Red chilli powder
Garam masala powder

Ajwain / Carom seeds (optional, I didn't used it but who like carom seeds in paratha, they can add it)
Chopped Coriander leaves

Water
Oil - 2 tbsp added in a dough
Desi Ghee for frying

Preparation Method :

1. First chopped methi leaves and then washed it properly to remove dirt and impurities from fenugreek leaves.

2. Combine whole wheat flour, add a teaspoons of oil, salt, red chilli powder, garam masala powder, chopped coriander leaves and prepared chopped methi leaves in a deep bowl, rub the flour using with your hands without water just like bread crumb.

3. Now, add water as required and knead a smooth and soft dough. Keep it aside the dough for 10-15 minutes.


4.
Divine the dough into medium sized balls. Take a medium sized ball and roll out the half way to a roti and add little bit oil/desi ghee inside the roti in center and spread it using with your hands, now close the roti as shown in the picture and flatten it in between your palms.


 5. Roll out the same again very gently into a roti but little bit thick other than plain roti.

6. Now place it on a heated tawa and cook it as you would cook plain paratha. Cook one side with oil until light brown spots appear on one side as shown in above pic. You can use the above dough for making "Methi Puri" also a crispy deep fried Indian bread.

 
7. Serve hot-hot paratha with yummy any of your favorite pickle, curd, white butter, dry aloo veggie and tea.

 Note :- Keep this dough for 4-5 days in a fridge. 

Happy Cooking & Enjoy :)

RoshoGulla's are soft spongy cheese balls soaked in sugar syrup. As they call in Bengali, is the king of Bengali sweets. This is my first attempt to making "Homemade RasGulla" and it comes perfect and yummy :), my husband really liked it and become a fan of homemade sweets rather than market sweets ;) so decided to share this lovely recipe with you all. These look like big pearls and taste so delectable that you’ll fall in love with this dessert. 

The best part is that they are so easy to make. Although rasgullas will be easily available in any of your nearby sweet shop but the one’s you make yourself taste even sweeter.

Now it's time that you can make rasgullas at home with some easy steps. Be soft and gentle with them and they will be softer!!!


Ingredients : 

Full Cream Milk : 4 cups
Lemon juice : 1/2 cup
Water : 3 cups
Sugar : 1 cups (or adjust your sweetness according to your taste)

Preparation Method :

1. Boil milk in a vessel in high flame.

2. When the milk starts to boil, add the Lemon juice to it slowly. Stir the mixture until the milk fat(paneer) and water gets separated.

3. Filter the mixture using a clean cloth and drain the water out of the mixture.

4. Once the water is drained out, wash the milk fat using some plain water to remove the lemon taste.

5. Press and rub the milk fat for around 1-2 minutes to remove the excess water.
 
6.  Now is the time to kneed the paneer(milk fat). Gently knead the paneer, till it is smooth and does not crumble. Kneading is the very important step. You have to knead till paneer is really-really smooth and soft.

7. Divide the kneaded paneer into small balls to cook.

8. Add sugar to 4 cups of plain water and boil in pressure cooker. Once the sugar water mixture starts to boil, add the milk fat balls to it.

9. Cover the cooker and cook without whistle for about 7-8 minutes on medium low flame

10. Turn off the heat and wait 5After 5-7 minutes, open the cooker, you’ll see balls are double their size now and transfer the contents(sugar mixture and Rasgulla) into another vessel.

11. Keep the contents in a refrigerator and allow it to cool. Your Rasgulla is ready to eat and Serve the Homemade RasGulla cold.
 
Today, I am very excited to share my recipe for "Sinful Punjabi Kadhi Pakoda" recipe on my blog.This is traditional and authentic Punjabi Kadhi Pakoda recipe. It is a yogurt gram flour curry recipe which is best going with rice, roti and paratha. This is my mom's recipe, i learn it from my mom, oftenly made at our home, she makes fabulous and one can just licking their fingers.

I just love kadhi with pakoda. This is one of the famous authentic dish now-a-days its famous around India. I just love to eat kadhi with jeera rice, its best going with boiled rice also and you can also have it with roti or plain paratha.

Every region have their own ways of making kadhi. The punjabi kadhi is different from other regional kadhi dish because it is more thicker and creamier also. Punjabi kadhi pakoda is a very delicious recipe. Learn how to make Punjabi kadhi pakoda by following this easy step by step process with images.


Ingredients : 

For plain pakoda's/fritters:

Besan/gram flour - 2 cups

Ajwain/ Carrom seeds - 1 tbsp
Red chilli powder - 1/2 tbsp, you can adjust the spices according to your taste also
Garam Masala powder - 1/2 tbsp 
Salt to taste
Pinch of Hing (optional)
Water as required to make thick batter for pakode


**Tip** You can make onion pakode's also by adding 4 medium sized sliced onions on the above gram flour batter. This is plain pakoda recipe. I can make pakoda in both ways plain sometimes onion pakoda also

For the curd sauce/kadhi:

Sour curd or you can use buttermilk also for making kadhi - 1/2 litre
Besan/gram flour - 1 cup or less
Red chili powder - 1 tbsp
Turmeric powder - 1.5 tbsp
Garam masala powder - 1 tbsp

Salt to taste
Water

For the tempering/tadka:
Chopped sliced Onion -  2 medium sized
Cumin seeds - 1 tbsp

Mustard seeds - 1/2 tbsp
Methi/fenugreek seeds - 1/2 tbsp
Curry leaves - 8-10 nos
Chopped green chillies (optional)
Dry red chilies- 1-2 (optional)
V
egetable oil or ghee or any

Preparation Method :

Preparing the Plain Pakoda's:

 
1. In a bowl, add gram flour/besan with carom seeds, red chili powder, garam masala powder, pinch of hing and salt.

2. Pour a little water and mix it very well, make a thick batter and keep it aside for some 10-15 minutes, check the salt and spices and add more if required.
 Note : If you're making onion pakode, then don't add too much water as the onions will release water later.

3.
Heat oil in a kadai and deep fry the pakoda's. Using with spoon, take the batter in a spoon & pour the batter in a kadai, Fry the pakoda's till they crisp and browned. Drain on kitchen paper napkins or tissues. Keep the pakoda's aside.
Preparing the the curd/yogurt kadhi:
1. In a big bowl, take the curd, whip it with wooden spatula well to make it smooth and add the
gram flour/besan and spice powders - turmeric powder, red chili powder, garam masala powder and salt.
Pour water and mix the contents well and make sure there are no lumps. Can you see the flour lump that means i have to dissolve the lumps well.

2. Use a spoon to dissolve the lumps into the curd. You can use a blender to make this mixture, but make sure you don't over do it otherwise you will get butter instead of curd ;-) 

3. Now in a large deep pan, heat vegetable oil, add cumin seeds, methi seeds, mustard seeds and let them sizzle. Now add curry leaves and dry red chilies(optional) I didn't use it because my husband don't like it..

4. Add chopped sliced onions and cook it till transparent. 

5. Now pour our liquid curd mixture into above tadka. Mix well.
6. Now bring the whole kadhi to a boil first in a high medium flame and..
7. Then reduce the flame in medium heat and simmer for 8-10 minutes. So the punjabi kadhi is ready. 

Add the fried pakoda's to the hot kadhi. Cover and close the pan. Let the onion pakoda's be soaked in the kadhi for some minutes. 
Tip** You can add pakode's before 15 min at the time of eating otherwise pakode's will more soak the curry.
8. Serve the punjabi kadhi pakora with warm rice, roti, paratha, topped with few teaspoonfuls of ghee.
 Enjoy and Happy Cooking :)
Newer Posts Older Posts Home

Page views

About Me

About Me
Hello. I'm Jolly Makkar, a food blogger, a mommy of 1 son and nature lover. Thank you for stopping by! Welcome to my Food Blog.

my favorite recipes

  • JollyHomemadeRecipes
  • JollyHomemadeRecipes

Featured Post

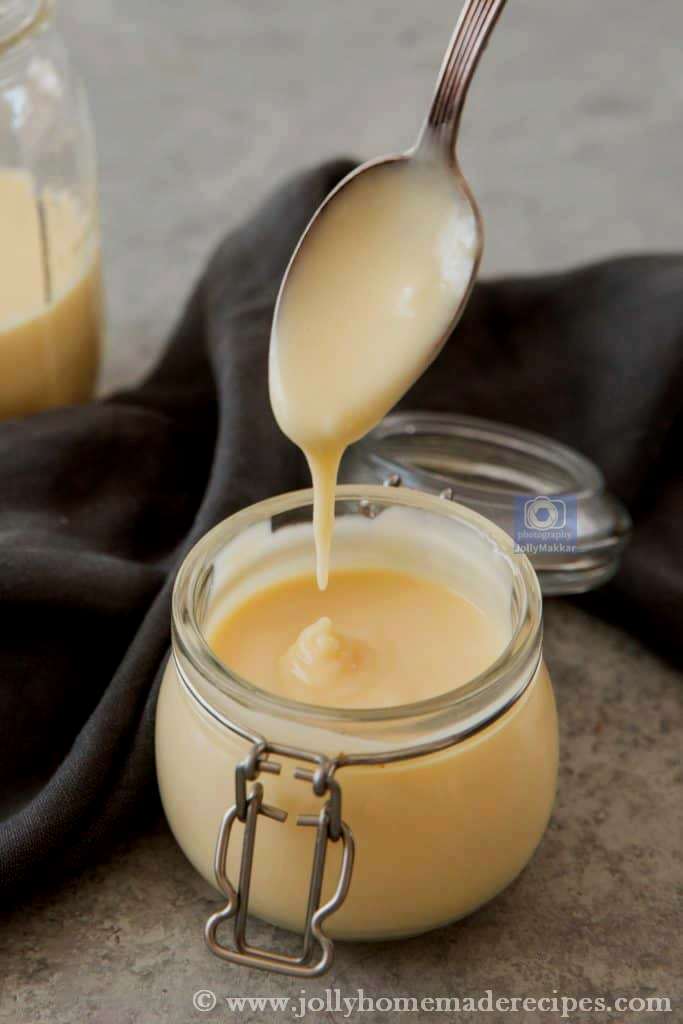
Homemade Condensed Milk Recipe | How to make Condensed Milk at Home | 3 Ingredients Condensed Milk(Video Recipe)

SUBSCRIBE & FOLLOW

POPULAR POSTS

  • Meethi Seviyan without Milk | Dry Sweet Vermicelli | Meethi Sewai Recipe
  • Rava Cake | How to make Sooji Atta Cake | Semolina Cake(Eggless)
  • Sooji Halwa Recipe, How to make Sooji ka Halwa - Ashtami Prasad | Indian Style Slow Cook Semolina Pudding
  • Watermelon Granita | Easy 3 Ingredients Watermelon Granita
  • Aloo Tamatar ki Sukhi Sabzi | Potato Tomato Stir Fry | Aloo Tamatar Ki Sabji
  • Moong Masoor Dal Khichdi | Dal Khichdi Recipe | Easy Khichdi Recipe
  • Shahi Phirni | How to make Best Phirni Recipe | Indian Royal Rice Pudding
  • Paneer Kheer | How to make Paneer Kheer
  • Cinnamon Sugar Bread Crust Treats, Leftover Cinnamon Sugar Breadsticks Recipe
  • Creamy Cantaloupe Smoothie Recipe, How to make Muskmelon Banana Smoothie

Search This Blog

Categories

  • 15 Minutes Recipes 39
  • A to Z Recipe Challenge 31
  • Bachelor Recipes 64
  • Collaboration 1
  • Curries & Lentils 26
  • Drinks & Beverages 47
  • Festival Recipes 55
  • Indian Breads & Parathas 25
  • International Cuisine 51
  • Kids Recipes 120
  • Navratri & Fasting Recipes 8
  • North-Indian Recipes 36
  • Pancake Recipes 12
  • Popular Indian Recipes 80
  • Tiffin Recipes 34
  • breakfast 101
  • sweets 55
  • vegan recipes 85
  • vegetarian 104

Blog Archive

Pinterest

Visit JollyHomemadeRecipes's profile on Pinterest.

Contact Form

Name

Email *

Message *

Powered by Blogger.
Protected by Copyscape Creative Commons License
This work is licensed under a Creative Commons Attribution-NonCommercial 4.0 International License

Copyright © ; Homemade Recipes. Designed by OddThemes | Distributed By Gooyaabi Template