Homemade Recipes

  • Home
  • About & Connect
  • Recipe Index
    • Cuisines
      • North Indian Cuisine
      • South Indian Cuisine
      • International Cuisine
      • Regional Indian Cuisine
    • Baking
    • Breakfast
    • Beverages
    • Curries & Lentils
    • Healthy Recipes
    • Kids Recipes
    • Rice Recipes
    • Vegan
  • Collaborations
  • Privacy Policy
  • Contact Us


THANDAI Cake

Thandai cake is a fun Indian fusion dessert that combines the flavours of popular  drink made on the festive occasion in India i.e  Holi or Maha Shivratri. Thandai in the form of cake making it totally irresistible! Egg-free, buttress free, it’s easy to make, and absolutely delicious!

In this post sharing how to make this Holi special cake with step by step pics and video too!!

EGGLESS THANDAI CAKE VIDEO

What is THandai

Thandai is a traditional Indian drink made with nuts, seeds and flavored with fragrant spices. This refreshing drink is popularly made on the festive occasion of Mahashivratri and Holi.

This Thandai Cake is

  • eggless and butter-free
  • soft and moist
  • easy to make
  • tastes just like a traditional thandai drink
  • you can make it ahead of time
  • perfect for Holi festival or any celebration

  • Thandai Cake Eggless

    How to store Eggless thandai cake?

    Thandai cake can be stored covered with foil paper(I have shown in my video, check it out how to store it) and refrigerated for up to a week or frozen for longer use. Allow cooling completely before storing.

    PREP TIME :15 mins

    COOK TIME :40 mins

    TOTAL TIME : 55 mins

    COURSE : Dessert

    CUISINE : Indian

    Author : Jolly Makkar

    INGREDIENTS

    For Thandai Cake

    . All-purpose flour/ maida - 1 cup

    . Granualted sugar - 1/3 cup + 1 tbsp

    . Baking powder - 1 teaspoon

    . Baking soda - 1/4 teaspoon

    . A pinch  teaspoon salt

    . Thandai Powder - 2 tbsp

    . Thick curd or Yogurt at room temperature - 1/2 cup

    . Vegetable oil

    . Warm milk - 1/4 cup + 2 tbsp

    . Chopped Pistachios - 3 to 4

    . Chopped Almonds - 5 to 6

    INSTRUCTIONS:

    1. To bake thandai cake, Preheat the oven to 350°F or 180 C. Lightly grease (spray oil) inside the cake tinand lining with butter paper and Keep aside.

    2. Take warm milk in a bowl. Add thandai powder and mix well. Keep it aside at room temperature.

    3. Sieve together flour, baking powder and baking soda in a bowl. Keep them aside.

    Making of Thandai cake

    4. In a bowl, take curd(yogurt) and add sugar to it. Whisk well till sugar is completely dissolved. Add thandai milk and oil. Whisk again for 6 to 8 minutes so that all wet ingredients mix properly.

    5. Now its time to mixing DRY ingredients with WET ingredients together, divide into 3 parts and start mixing by using CUT and FOLD method. You can dry fruits in cake also, but I didn't add.

    6. Once the batter is ready, pour it into cake tin and leveeled the cake with spatula.Tap the cake tin for 2-3 times to get rid of air bubbles. Garnish the cake with chopped almonds and pistachios.

    7. Bake at 180 C for 30 minutes. Check the centre of the cake by using a toothpick or knife. If it comes out clean means cake is ready or If not bake for 2 more minutes.

    ठंडाई केक

    8. Transfer it on wire rack to cool down completely and Enjoy the soft, delicious and lip smacking thandai cake with tea or coffee.

    Thandai cake eggless by JollyHomemadeRecipes

    NOTES

    ⏺️For measuring your flour, do not scoop it out of the container directly using the measuring cup. 

    ⏺️Thandai milk - I prefer making mine from scratch and highly recommend doing so but you can also use your favorite store-bought readymade thandai powder/masala to make your thandai. 

    ⏺️Serving - You can serve this cake chilled (since thandai is usually served chilled) or warm it up in the microwave for 10-15 seconds to get it all warm and melty. 

    ⏺️Storage - Thandai cake can be stored covered and refrigerated for up to a week or frozen for longer use. Allow cooling completely before storing.

    Eggless Cake Recipe


    Rajma Masala Powder Recipe

    Rajma Masala Powder is a extremely good mixture of Spices with flavours accentuating from the Spices utilized in it with a slight notice of tanginess from Amchur (Dry Mango Powder) and Soury -candy flavor from Anar Dhana(Dry Pomegranate Seeds Powder).  

    Freshly grounded homemade Rajma Masala Powder is the soul of Rajma Masala. Perfectly cooked Rajma/Kidney Beans combination at the side of the masala blend and a rich & creamy primarily based totally Rajma Masala curry. 

    Now, you need not to be buy it from market, you can make it at home with fresh spices and store in an air-tight container. You can use this Rajma Masala powder with up to 1 month. 

    Homemade spices are always best,very easy and quick process. Well, the answer is simple – it’s

       No preservatives,

       Unique Aroma and

       WONDERFUL taste

    How to make Rajma Masala Powder
    Check out other homemade spice powders recipe


    Author : Jolly Makkar

    Cooking time : 5 minutes

    Total Time: 10 minutes

    Course: Masala / Indian spice

    Cuisine: Indian (Punjabi)

    INGREDIENTS :

    For Rajma Masala Powder :

    Dry Red Chillies - 10-12 Nos.

    Coriander Seeds - 1/2 Cup

    Cumin Seeds - 1 Tbspn

    Carom(Ajwain) Seeds - 2 Tspn

    Bay Leaves - 3 Nos.

    Dry Ginger Powder -1 Tbspn

    Black Cardamom - 5-6 Pods

    Cloves - 6-8 Nos.

    Mace - 3-4 Strands

    Nutmeg - 1 No.

    Dry Mango Powder (Amchur) - 3 Tbspn

    Dry Pomegranate Seeds Powder(Anar Dhana) - 4 Tbsps

    Fennel seeds - 1 teaspoon

    INSTRUCTIONS  :

    • Dry Roast the Dry Red Chillies in a pan until it fluffs-up and keep it aside.
    • Dry Roast Coriander Seeds on a low flame until fragrant for about 5-7 minutes and keep it aside.
    • Next, add Carom Seeds & Cumin Seeds into the pan and dry roast it on a low flame until the spices splutter.
    • Remove it from the pan and keep it aside.
    • Next add Bay Leaves, Cloves, Mace, Fennel and Pomegranate Seeds into the pan and dry roast it on a low flame until the spices turn aromatic.
    • Allow the dry roasted ingredients to cool down.
    • Do not Roast Dry Ginger Powder, Dry Mango Powder & Nutmeg.
    • Combine all the ingredients and grind it into a fine powder.
    • Transfer the Rajma Masala Powder into a clean and dry airtight container.
    • Store it in the refrigerator for longer shelf life.
    Rajma Masala Recipe


      NOTES :

      • Can sundry the Spices before preparing the Rajma Masala Powder, but it is purely optional.
      • Dry Roast the ingredients separately.
      • Dry roast the spices on a very low flame.
      • Care should be taken not to burn the ingredients which will totally spoil/alter the taste of the Masala.
      • Do not dry roast Dry Ginger Powder, Dry Mango Powder & Nutmeg.
      • Cool the ingredients before grinding it.
    • This recipe is a part of A to Z recipe challenge, we choose key ingredients alphabetically to cook and post a dish every month. This month it was alphabet time "R" so I choose my key ingredients RAJMA and make this easy and flavourful Rajma Masala Powder  and will update the whole video soon on my YOUTUBE channel - JOLLYhOMEMADErECIPES 


      Did you try this recipe? Click a picture and mention @jollyhomemaderecipes or tag #jollyhomemaderecipes in Instagram or Twitter

      Subscribe to our YouTube Channel Click here to Subscribe our YouTube Channel and stay updated with our latest video recipes

      PIN IT later for your future use


    Paneer Kheer

    Paneer Kheer is an Indian dessert made using crumbled paneer or chenna, saffron, and rich dry fruits. It is easy to make and tastes so delicious…perfect  for get together and special occasions. 

    Here are some more Kheer Recipes, which are apt to make during festivals – Mango Kheer, chaawal ki Kheer, seviyan Kheer, phirni 

    Paneer Kheer tastes a lot like Rasamalai with pieces of soft chenna soaked in flavored milk coming in each bite.

    This Indian sweet takes a few minutes to cook and tastes so different from normal kheer. Moreover, it is made using very basic ingredients which are mostly available in our kitchen.

    I have made this Kheer from fresh chenna but you can make it from soft market based paneer too, just crumbled it and use it. 

    Serve it hot or chilled, I personally like to serve it chilled with lots of dry fruits & rose petals on top. You can also serve it with poori or sweets after meal. 

    Paneer Kheer will last for 2 to 3 days in the refrigerator. Make sure you store it in an airtight container.
    How to make Paneer Kheer

    INGREDIENTS:

    • 2 and ½ litres full fat milk (divided)

    • 2 teaspoon lime juice

    • 10-15 strands saffron (optional)

    • ¼ cup sugar

    • ½ teaspoon cardamom powder

    • Dry fruits or rose petals for garnishing

    INSTRUCTIONS:

    • Heat 1-liter milk in a heavy bottom pan. It’s best to use full cream milk to make the kheer as it is richer than cow’s milk. But if you don’t have you can use any milk to make the kheer. Keep stirring the milk while heating otherwise it will stick to the bottom of the pan and get burned.
    • When the milk comes to a boil, switch off the heat. Add lime juice and give it a stir.
    • Milk will curdle immediately after adding the lime juice. If it doesn’t, then add some more lime juice to the pan. Let the curdled milk rest for 5 minutes. Strain it in a soup strainer and collect the cheese. Do not discard the water that is left behind. It has many nutritional benefits and can be used to make curries or kneading flour.
    • Keep the strainer with paneer under running water for a few seconds so that the excess lime flavor is gone. Let the strainer rest over a vessel to get rid of all the excess water for about 30 minutes.
    • Meanwhile, heat the remaining 1 and ½ liters of milk in another heavy bottom pan. Keep stirring at regular intervals to avoid burning the milk at the bottom of the pan.
    • Simmer the heat to low once the milk comes to a boil. Add saffron strands to the pan and mix well. You can skip adding saffron if you wish to.
    • Let the milk cook for 20-25 minutes on low heat until it is reduced to almost half. Keep stirring at regular intervals. Crumble the paneer or chenna that we made earlier and add it to the pan.
    • Cook for another 30-35 minutes, until the milk is thickened. Keep in mind that the kheer will thicken some more after cooling. Add sugar and cardamom powder and cook for another 2-3 minutes. Adjust the amount of sugar according to your liking.
    • Paneer ki kheer is ready to serve. Serve it warm or chill it for a few hours. Garnish with almond and pistachio slivers and dry rose petals.
      Paneer wali Kheer recipe
    This recipe is a part of A to Z recipe challenge, we choose key ingredients alphabetically to cook and post a dish every month. This month it was alphabet time "P" so I choose my key ingredients PANEER and make this delicious PANEER KHEER and will update the whole video soon on my YOUTUBE channel - JOLLYhOMEMADErECIPES 

    Did you try this recipe? Click a picture and mention @jollyhomemaderecipes or tag #jollyhomemaderecipes in Instagram or Twitter

    Subscribe to our YouTube Channel Click here to Subscribe our YouTube Channel and stay updated with our latest video recipes

    PIN IT later for your future use


    Happy Cooking &Enjoy 😋😋

    How to make Mawa Gujiya

    Sooji Mawa Gujiya Recipe- A crisp flaky deep fried pastry stuffed with  khoya or mawa, coconut and dry fruits. A popular traditional North Indian sweet which is a must to make especially during festive holidays times (Holi, or famous during wedding times).

    Trust me, this is the first time in my life I have tried my hands on sooji mawa gujiya recipe. I bet you just can't resist these golden crisp sweet beauties when you tried my recipe at your home😍

    Sooji Mawa Gujiya Recipe

    Check out the video recipe of Sooji Mawa Gujiya - 100% crispy


    What Is Gujiya?

    Gujiya is a deep fried flour pastry stuffed with khoya, dry fruits and coconut. Popular not only in UP, but they are widely made in Rajasthan, Madhya Pradesh and Bihar 

    Gujiya Recipe

    These sweet dumplings has the filling of mawa in north. And, the Maharashtrian version goes with semolina or suji, and coconut filling. And I made a combination of version of these two in one.

    How to store it?

    Once the Gujiyas are out from the hot ghee to oil, allow them to cool completely. Then, transfer them into a clean airtight container and store them up to a week at room temperature. They stay very well in refrigerator up to a 15 days.

     You can try more INDIAN lip-smacking sweet desserts recipes 

    Kesari Angoori Rasmalai

    Til Gud ki Patti 

    Pheni Kheer

    Doodh Peda

    Ingredients :

  • Plain Flour (मैदा )  - 2 cups ( 250 gms)
  • Ghee (घी )  - 1/4 cup ( 60 gms) 
  • Homemade Mawa - 1/2 cup ( 125 gms) 
  • Semolina (सूजी )  - 1/3 cup ( 60 gms)
  • Boora (बूरा ) - 3/4 cup ( 150 gms) 
  • Almonds (बादाम)  - 10 to 12 (finely chopped ) 
  • Cashew nuts (काजू )  - 10 to 12 (finely chopped)
  • Grated Dry coconut (सूखा नारियल )  - 1/3 cup 
  • Raisins (किशमिश )  - 1 tbsp 
  • Green Cardamoms (इलाइची )  - 6 to 7 
  • Oil/Ghee   - For frying
  • Instructions :

    How to make Sooji Mawa Gujiya

     1. Take Plain flour in a mixing bowl, make a hollow pit in it, mixing ghee and flour with fingers first until crumbly. And the flour mixture should hold the shape of a fist. Add lukewarm water in small portions and knead stiff dough.Cover and keep it aside for 20 to 25 minutes to set.

    For stuffing:
    2.Heat pan, add 2 tbsp ghee to it as ghee melts add semolina to it, Stir and roast it, until golden brown. Keep flame medium. Take powder sugar in a bowl, take out semolina, pour over the sugar. 

    3. Roast dry fruits, such as cashews, almonds for 1 to 2 minutes. Then take out and keep in the same bowl as boora  and semolina. Slightly roast dessicated coconut, in hot pan for half a minute. Keep in same bowl.

    4. Crumble and add mawa to the pan, stir and roast, till it changes color. Keep flame medium. Add raisins to the bowl,

    5. Take cardamoms coarsely grind them and add into bowl. Mix all ingredients well.

    6. Meanwhile dough is ready, knead it a bit.Divide dough into 2 parts, make a log, break lumps. Lift dough lump, press and make round dough ball, like a peda. Roll it out thin from the edges with 3 to 4 inch in diameter.

    7. Take the poori. Put stuffing in the poori, grease edges of poori with water. Close it with fork or pinch it with ur fingers, keep the gujiya in a plate. Likewise roll out , stuff and prepare all gujiyas. Keep in plate.

    Check Out The Video  Of How to make Mawa at home 


    8. Heat oil to fry the gujiyas, keep it medium hot. Put one gujiya to fry and check, when frying reduce flame. Put as many gujiyas as they fit in the wok. Once roasted from beneath, flip them. Stir and fry until golden brown from both sides, Keep flame medium low. Lift the gujiya in ladle. Take out from the wok, keep in plate, Fry all Gujiyas likewise. 

    9. Sumptuous, Sooji mawa gujiya's are ready As the gujiyas cool down, keep in an air tight container, and relish it for 15 days.


    Important Tips: 

    • To make Stuffing roast all the ingredients well.
    • To make the dough crisp and flaky, always mix ghee and flour with fingers first until crumbly. And the flour mixture should hold the shape of a fist. Then add water and knead into a soft dough
    • Do not knead the dough to soft or too stiff. It should be such so that is rolled out nicely even without dry flour or ghee. Always allow the dough to rest for 30 minutes for best results.
    •  Ensure the dough is covered with clean damp kitchen towel all the time to avoid drying.
    • While making the filling, always add sugar once the mawa cools completely. You can also use moulds to make the gujiyas.
    • While shaping the gujias, always apply water to the edges of the rolled dough using fingers. Or you can also use small brush and then press to seal. This ensures proper sealing of the edges avoiding the filling to break open while frying.
    • Keep the moulded gujias covered with a clean damp cloth to avoid drying, until the batch is ready to fry.
    • Always deep fry them on medium low heat. Never ever fry them on high heat as it will burn them and pastry will remain uncooked within. Frying them on low heat makes them crispier.
    • Do not overload the pan while deep frying the Gujiya, do it in batches. Also, each batch will take 15-17 minutes to cook.
    •  
    This recipe is a part of A to Z recipe challenge, we choose key ingredients alphabetically to cook and post a dish every month. This month it was alphabet time "M" so I choose my key ingredients MAWA and make this delicious Sooji Mawa Gujiya and will update the whole video soon on my YOUTUBE channel - JOLLYhOMEMADErECIPES 


    Did you try this recipe? Click a picture and mention @jollyhomemaderecipes or tag #jollyhomemaderecipes in Instagram or Twitter

    Subscribe to our YouTube Channel Click here to Subscribe our YouTube Channel and stay updated with our latest video recipes

    PIN IT later for your future use
    Happy Cooking & ENJOY!!


  • Older Posts Home

    Page views

    About Me

    About Me
    Hello. I'm Jolly Makkar, a food blogger, a mommy of 1 son and nature lover. Thank you for stopping by! Welcome to my Food Blog.

    my favorite recipes

    • JollyHomemadeRecipes
    • JollyHomemadeRecipes

    Featured Post

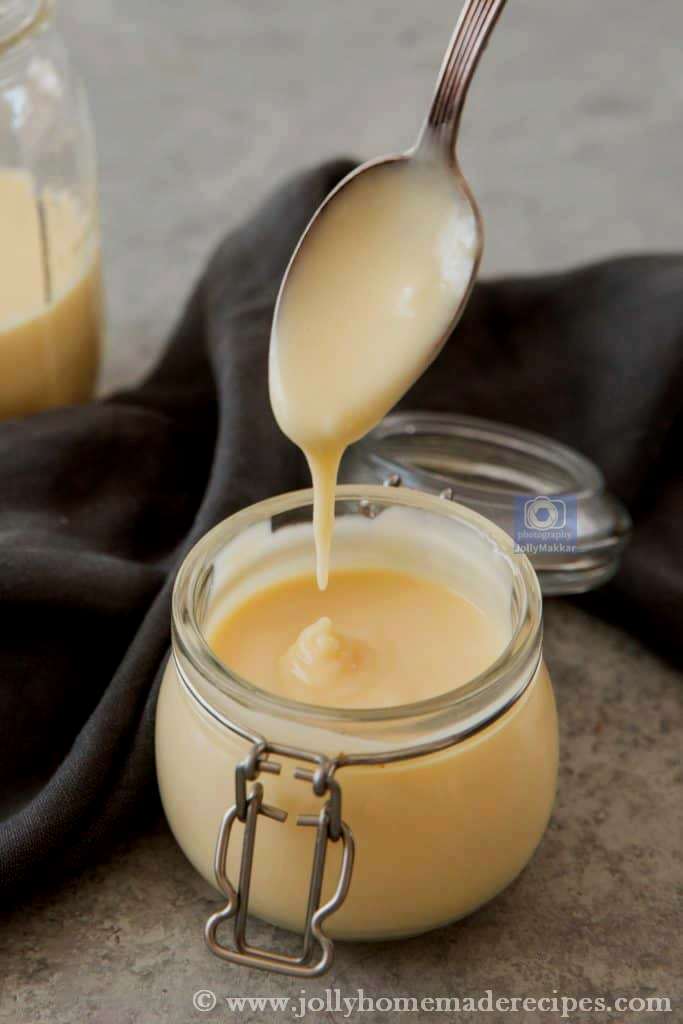
    Homemade Condensed Milk Recipe | How to make Condensed Milk at Home | 3 Ingredients Condensed Milk(Video Recipe)

    SUBSCRIBE & FOLLOW

    POPULAR POSTS

    • Dates, Almond and Coconut Rolls, No Bake Coconut and Dates Balls | 3 Ingredient Date Bites
    • Moong Masoor Dal Khichdi | Dal Khichdi Recipe | Easy Khichdi Recipe
    • Cinnamon Nutmeg Banana Bread | Nutmeg Cinnamon Spiced Banana Bread
    • Best Traditional Diwali Recipes | Easy Diwali Sweets & Snacks
    • Gujarati Methi Thepla Recipe, How to make Methi Thepla | Fenugreek flavoured Gujarati Flatbread
    • Aloo Methi Tamatar Sabzi, How to make Alu Methi ki Sabzi- Lunch Box Recipe
    • Watermelon Popsicle Recipe, How to make Easy Watermelon Popsicle | 3 Ingredients Watermelon Popsicle
    • Baked Italian Chicken Legs Recipe, How to make Italian Chicken Drumsticks | Baked Chicken Drumsticks
    • Cinnamon Sugar Bread Crust Treats, Leftover Cinnamon Sugar Breadsticks Recipe
    • Tortilla Pizza Recipe, How to make Tortilla Wrap Pizza Recipe

    Search This Blog

    Categories

    • 15 Minutes Recipes 39
    • A to Z Recipe Challenge 29
    • Bachelor Recipes 64
    • breakfast 101
    • Collaboration 1
    • Curries & Lentils 26
    • Drinks & Beverages 47
    • Festival Recipes 54
    • Indian Breads & Parathas 25
    • International Cuisine 51
    • Kids Recipes 120
    • Navratri & Fasting Recipes 8
    • North-Indian Recipes 36
    • Pancake Recipes 12
    • Popular Indian Recipes 79
    • sweets 55
    • Tiffin Recipes 34
    • vegan recipes 85
    • vegetarian 103

    Blog Archive

    Pinterest

    Visit JollyHomemadeRecipes's profile on Pinterest.

    Contact Form

    Name

    Email *

    Message *

    Powered by Blogger.
    Protected by Copyscape Creative Commons License
    This work is licensed under a Creative Commons Attribution-NonCommercial 4.0 International License

    Copyright © ; Homemade Recipes. Designed by OddThemes | Distributed By Gooyaabi Template