Jolly Homemade Recipes

  • Home
  • About & Connect
  • Recipe Index
    • Cuisines
      • North Indian Cuisine
      • South Indian Cuisine
      • International Cuisine
      • Regional Indian Cuisine
    • Baking
    • Breakfast
    • Beverages
    • Curries & Lentils
    • Healthy Recipes
    • Kids Recipes
    • Rice Recipes
    • Vegan
  • Collaborations
  • Privacy Policy
  • Contact Us
Cucumber Lassi with step by step photos recipe : It is yet another cool & refreshing drink to beat the heat in summers. This time I tried new version of Lassi with "cucumber". It is very delicious and healthy drink with lots of fiber. 

This creamy-chilled drink is purely delicious. Lassi becomes famous drink all-over India, because lassi is very good specially during hot summer days and not only as beverage but this also works as great appetizer. 
Easy to prepare, easy to digest and very healthy recipe made with few ingredients. Perfect for fasting days !!

Cucumber Lassi is easy, quick lassi recipe with addition of cucumber, mint leaves, coriander leaves and curd. If you like lassi then you will love this one too. This namkeen(salted) lassi would be great appetizer or even as quick breakfast.

I always like refreshing cucumber in beverages and one of my favorite is Cucumber Lemonade which I make the most and this lassi is something that I wanted to post for long time and finally this is happening! 

Important Note*-  After having Lassi please don't consume / drink water, not good for health. 

You can make end number of lassi like black-grapes lassi, masala buttermilk and chilled mango lassi

Let's start to make this easy and quick recipe with simple step-by-step process with photos.   

Servings - 2 
Time - 10-15 minutes

Ingredients:

Plain Yogurt/Curd/Dahi - 1.5 Cups
Chopped Cucumber - 1 Cup
Chopped Coriander Leaves
Mint Leaves  - 4 Stalks

Cumin Powder - 1/2 tsp
Salt to taste / Sendha namak (use during fasting days)

Ice cubes

Preparation Method :

1. Peel and chop cucumber and grind together in a blender or mixer with coriander leaves, mint leaves and salt for a minute. You can add ginger also ( it's optional) my husband doesn't liked ginger so I didn't used.


2. Add curd/yogurt and blend again for a minute. Pour in serving glass and sprinkle 1/2 tsp of cumin powder in each glass.

3. Sprinkle with cumin powder or even add chaat masala. Garnish with coriander leaves and slice of cucumber. Serve immediately, you can use ice cubes if preferred.

*Notes*
  • You can add 1 cup water and make this as cucumber buttermilk instead of lassi.
Happy Cooking & Enjoy :)
An Orange Chiffon Cake has wonderful light and spongy texture cake. Delicious orange zest with a hint of lemon in every bite. Moist, spongy orange cake is perfect for any celebration. However, this chiffon cakes contain both egg yolks and egg whites, along with baking powder, orange juice, tanginess of lemon juice and a liquid fat (in the form of oil). It is the oil that gives this cake its wonderful moist and tender crumb and keeps the cake soft even when refrigerated. 

You can even frost the cake with some orange whipped cream or butter icing. I like to dust the top of the cake with powdered sugar and it is lovely when served with fresh fruit (or chocolate sauces) and softly whipped cream.
The appearance is satisfying and flavors too are rich, moist and yummy. There's just something so appealing when you cut off a slice. It was really-really yum can't express in words :D just out of the world :)

Orange chiffon cake has the flavors of oranges and lemon. This is very moist cake...melting in a mouth yummy...delicious this one word is coming after having a bite of this cake.

I have adapted an idea from here ndtvfood, but done little bit changes done from my side. 

I have made the orange cake with fresh orange juice but you can use ready-made juice. The cake has the orange and lime flavor with a light yellowish-orange color.

You can make end number of cake which I have tried and tested like biscuit cake, chocolate cake and vanilla-chocolate swirled marble cake

A soft and light cake. Here’s an easy, simple recipe of orange cake with step by step photos – 


Ingredients :

All - Purpose flour / Maida - 1 cup

Caster Sugar - 1/2 cup
Butter, room temperature  - 50 gm (or you can take vegetable oil with same quantity) Eggs - 2 no
Baking powder - 1 tsp
Orange juice - 1/2 cup
Lemon juice - 1 tsp
Milk -
1/2 cup
Orange zest - 1/2 tsp (optional)
Oil - 3 tsp
Vanilla extract - 2-3 drops
1 heaped cup of salt (If you are baking a cake in cooker)
 
Preparation Method :

1.
Take a bowl, beat the butter and sugar until light lemon-colored and fluffy, and add a tbsp of oil in it in between and whisk it about 5 minutes. 

  
2. Break the eggs, separate the yolks and the whites. Mix the yolks into the mixture with a rubber spatula or wooden spoon till it becomes light.

3.  I made fresh orange juice. you can use ready-made juice too. For making fresh juice, use an mixer grinder, you can also blend the orange segments (seeds removed) and strain the juice like I have done in below pic. I used two medium oranges to get 1/2 cup juice.

4. Add the flour, baking powder, orange juice, lemon juice, orange zest and the milk. 
 Mix it all together into a smooth batter.

5. Now beat the egg whites and add vanilla essence till they are stiff and fold them to the batter with a metal spoon. When you are folding, you will fell the lightness in batter. Sprinkle tutti-fruti from top.

For Cooker Process :

* Take a cake tin, brush with the melted butter evenly on the base and edges of the tin and also dust the inside of the tin with a little flour to help the cake can come outside smoothly from cake tin and not burn also.

Preheat cooker for cake, Take pressure cooker and put 1 cup salt all over.  Heat the pressure cooker(empty) covered but without the pressure 5 minutes on a high flame, then place your cake tin. Remove the gasket and whistle of pressure cooker. 


Place you cake tin on top of the salt. Close the lid and turn the flame on low and let it cook for 40 minutes-1 hour. After 45 minutes, insert toothpick in a cake, if it comes clean it means your cake is ready or if not you can cook for more 10 minutes.

For Oven Process:

* Stand this bowl in a pan of water and bake in a pre-heated oven for 30-40 minutes at 160 degrees Celsius.

7. Remove from cooker/oven and let it cool down. Turn it upside down to De-mold (use knife all around the edges before turning).

8. Dust the top of the cake with powdered sugar. Garnish with fresh fruit (or chocolate sauces) and softly whipped cream. Serve.

Enjoy and Happy Cooking :)
Thepla is another variation of parathas that have a great shelf-life and have an amazing flavor. Poha Thepla is a twist on the famous Indian flat-bread. It is made from flattened rice(poha), whole wheat flour with indian herbs & spices, that can be munched anytime of the day.

Poha thepla are very light as well as healthy and a very good snack which is liked by every generation.


Poha thepla is become my all time favorite meal at my home, because it is very easy and take less time to make. 

My husband is from Maharashtra and he loves poha very much, every weekend he wanted poha in breakfast. I am from punjabi family, I love to eat paratha's in breakfast, so I am confused how can I fulfill my husband requirement for breakfast and mine too :P :D so I mixed up those requirement Poha + Paratha and made this new and fusion paratha recipe. 

My husband really liked this fusion paratha, he won't believe that we can make paratha from poha also :) :). My husband and my fans really like this paratha and they named me as "Paratha Queen" feeling great ^_^.
If you love to make and eat Gujarati food, then thepla is a must item to try. This is perfect food to take along for long journey, because it's not sticky and as well as their taste and texture is remain same...crunchy, when it is cold also. It is very nutritious also as well as yummy Indian bread, which is liked by every generation. 

You can make end number of parathas like rice paratha, fusion stuffed papad paratha, sambar paratha, methi paratha, lachha paratha, onion paratha and many more. 

Ingredients : 

Whole Wheat Flour - 1 Cup
Poha(flattened rice) - 1/2 Cup 
Turmeric Powder - 1/4 tsp
Red Chilli Powder - 1/2 tsp
Coriander Leaves (Chopped) - 2 Tbsp
Garam masala powder - a pinch
Jeera - 1/2 tsp
Salt to taste
Oil - 2 tsp (for cooking the thepla)
Water - As needed

Preparation Method :

1. First, wash the poha and soak in warm water for about 10 minutes. Then squeeze out the extra water and keep aside. Squeezing out the water.

2. In a mixing bowl, add the soaked poha and rest of the ingredients like jeera, indian spices and chopped coriander leaves. Mix well to form a stiff dough. Add water as required. 
The dough should be little stiff than chapati dough or else you will not be able to roll it. 

3. Divide the dough into small sized balls. Take a small sized ball and roll out the flat like a roti using rolling pin.

4. Now place it on a heated tawa and cook it as you would cook plain paratha. Cook both the sides on medium flame with little oil until light brown spots appear on one side as shown in below pic. 

5.
Serve hot-hot paratha with yummy any of your favorite pickle, chutney,  butter and tea.

Enjoy & Happy Cooking :)   


A delicious dal recipe with a blend of moong and masoor dal. They are yellow-orange in color. This is an easy dal to make it. It tastes good with rice and its my favourite comfort food. As I am punjabi by birth, at my home, this is called by "Moongi di dal". It is a popular Indian dish made of red-yellow lentils and tempered with aromatic spices.

This is very popular dal in India and It is easy to cook. It's very light dal to eat. If you are looking for more dal recipes then do check dal fry, punjabi dal makhani, dal amritsari, tangy sambar (toor) dal.

It is a flavorful dal and our family staple food. Let's start to make this easy and quick recipe with simple step-by-step process. 

Ingredients :

Moong-Masoor dal mixed - 1 cup
Chopped Tomato into small cubes - 1 no
Finely
Chopped Onion - 1 no
Chopped garlic - 1/2 tsp
Chopped ginger - 1/2 tsp
Turmeric powder
Coriander Powder
Red chilli powder
Garam masala powder
Jeera (cumin seeds) - 1/2 tbsp
Finely chopped Green chillies - 1 no (optional)
Salt to taste
Chopped Coriander leaves to garnish
Desi ghee for tempering - 2 tbsp

Preparation Method :

1. Clean the dal and wash it and put into a pressure cooker. 
 Add 2 cups of water to it. Now add the turmeric powder and salt.

2. Cover the pressure cooker and set on the stove into a high flame. Give 1 whistle in a high flame, then reduce the flame in low mode and cook for 5 to 10 minutes more.

3. Turn of the flame and release the pressure from cooker. Now open the pressure cooker. And take it dal in a bowl and keep it aside.

4. For Tempering / Tadka
Step by step process :

(1) Heat desi ghee (or you take oil but Desi-ghee gives you the full desi aroma of dal ) in a saucepan and add jeera (2) add chopped onions, green chillies, ginger and garlic, cook it about 2 minutes till onion becomes transparent and soft. (3) Add the chopped tomatoes, (4) salt, turmeric powder, red chilli powder, coriander powder and saute for another 2 minutes, fry till the tomatoes become soft and mushy, (5) your tadka is ready, as shown in below picture

5. Once tadka is cooked well, add the boiled dal into it. Stir well. At end add garam masala powder. Mix well and cover it for few minutes.

6. Turn off the flame and add chopped coriander leaves. Dal tadka is ready to Serve.

8. You can serve with plain boiled rice, jeera rice and chapatti also.
 
Happy Cooking & Enjoy :)
Butter Naan is one of the Indian Flat Bread which is different from chapati. It is an easy homemade recipe. You can try this recipe in your kitchen with very easy steps. This is without yeast recipe.This is best going with all curry veggies like paneer butter masala, punjabi kabuli Cholley and many more. This naan bread is baked in Tawa / stove. Whenever I made Dal makhani at home, I usually made this butter naan with dal. 

Here's, learn how to make this simple and quick dish at home with step-by-step process.

Ingredients :

All Purpose Flour/ Maida - 2 cups
Butter - 2 tbsp
Curd - 2 tbsp
Sugar - 1 tbsp
Water
Salt to taste
Oil - 2 tbsp
Baking Soda - 1 tbsp
Vegetable Oil
Maida for dusting and helping in rolling the naans

Tip :  Crush the sugar in powder.

Preparation Method :

1. First mix all dry ingredients - maida, baking soda, salt and sugar.

2. Add wet ingredients (curd and vegetable oil) to the above dry mix.

3. Knead it well until you get a very soft dough. It will be sticky initially by continuous kneading and by adding very little flour it will become non sticky. Do not add more flour because naan will become hard.
4. Knead the dough covered with a damp cloth for 1-2 hrs in a warm place, so that dough become in double volume.
5. Knead the dough again for 5 minutes until soft with the help of your knuckles.

6. Divide the dough into medium sized balls and roll them with the help of dry flour and rolling pin/hand.

7. Heat an iron griddle on the stove and transfer the naan onto the griddle, wait until it starts to bubble and bit, then turn it to other side and add butter.

8. Once it is done on both the sides, just apply butter and transfer it to another container.

9. Bake the other naans in the same way as rest of the dough.

10. Serve them hot with gravy curries or dal makhani.

Enjoy & Happy Cooking :)
Chocolate Cake
Moist, delicious chocolate cake is perfect for any celebration. This is basic chocolate cake recipe with step by step photos. A simple and easy recipe of chocolate cake. I love baking, started baking cake, cookies.....in cooker. Yes you read right this spongy chocolate cake made in cooker only. Earlier I posted my "Vanilla-Chocolate Swirled Marble Cake" recipe, which is liked by all my family and friends even neighbor too. I usually bake cake once in a week.

This chocolate cake recipe is really good. One of the best cake, I have made at home. It was better than chocolate cakes, we get in markets. 

The appearance is satisfying and flavors too are rich, moist and yummy. There's just something so appealing when you cut off a slice. It was really really yum can't express in words :D just out of the world :) :) My husband really liked it and he loves homemade cake too. 

Homemade cake was my favorite, since from my childhood days, my Mom used to bake so many cakes using pressure cooker method as she did not have an electric oven at that time. In this cake, i didn't use any electric beater or taking help of any electronic device, just made this with purely with hand whisker.
This method has been tried and tested so many times in my house, I can assure you that your cake will turn out well.. Don't worry to those who don't have an oven..u can also bake a cake without an oven now..which gives same texture and taste..I adapted this cake recipe from Rachel Allen. Let's start baking our cake in pressure cooker with step by step process with following pictures...

Ingredients :

All - Purpose flour / Maida - 1 cup
Caster Sugar - 3/4 cup
Butter, room temperature  - 1/2 cup (or you can take vegetable oil with same quantity)

Harshly Chocolate Sauce - 4 big table spoon or you can take dark chocolate also
Eggs - 2 no
Cocoa powder - 1 tbsp
Baking powder - 1 tsp
Baking soda - 1/4 tsp
Milk - 3 tbsp
A pinch of Salt
1 heaped cup of salt while make baking


Making of Caster sugar at home ?
It's a very simple process - Add the sugar into the blender and pulse 15 times, or until the sugar becomes finely granulated.


Preparation Method :

1. Preheat cooker for cake, Take pressure cooker and put 1 cup salt all over.  Heat the pressure cooker(empty) covered but without the pressure 5 minutes on a high flame, then place your cake tin.


2. Take a bowl, beat the butter and sugar until light lemon-colored and fluffy, and add a tbsp of oil in it in between and whisk it about 5 minutes. 

3. Beat the butter until very soft then add the caster sugar and continue to beat until the mixture is pale and fluffy. Beat in the eggs, one at a time, fold into the melted chocolate sauce.


4. Measure out the flour, baking powder, baking soda and salt (sift all ingredients) into a small bowl and then add the milk and mix gently to combine with above batter.
 

5. Now we do, "Cut and Fold" method, I saw this tip in one of very fame English Food Channel "TLC"

In baking, "fold" is the term used for gently combining a delicate mixture into a heavier textured, thicker mixture in a way that will ensure that both mixtures are properly combined and ensuring that air bubbles in the lighter mixture are not burst by the heavier mixture.

Method : Take a rubber spatula or metallic spoon, Cut down through the center of the mixtures and bring the heavy mixture back up to the top, "down-across-up-and-over motion".

6. Take a cake tin, brush with the melted butter evenly on the base and edges of the tin and also dust the inside of the tin with a little flour to help the cake can come outside smoothly from cake tin and not burn also.


7. Place you cake tin on top of the salt.  Close the lid and turn the flame on low and let it cook for 45 minutes-1 hour.

8. After 45 minutes, take toothpicks, insert it in a cake, if it comes clean it means your cake is ready or if not you can cook for more 10 minutes.


9. Remove from cooker and let it cool down. Turn it upside down to De-mold (use knife all around the edges before turning).


10. Let's Enjoy your Chocolate Cake with your family and friends !!

Enjoy and Happy Cooking :)
Newer Posts Older Posts Home

Page views

About Me

About Me
Hello. I'm Jolly Makkar, a food blogger, a mommy of 1 son and nature lover. Thank you for stopping by! Welcome to my Food Blog.

my favorite recipes

  • JollyHomemadeRecipes
  • JollyHomemadeRecipes

Featured Post

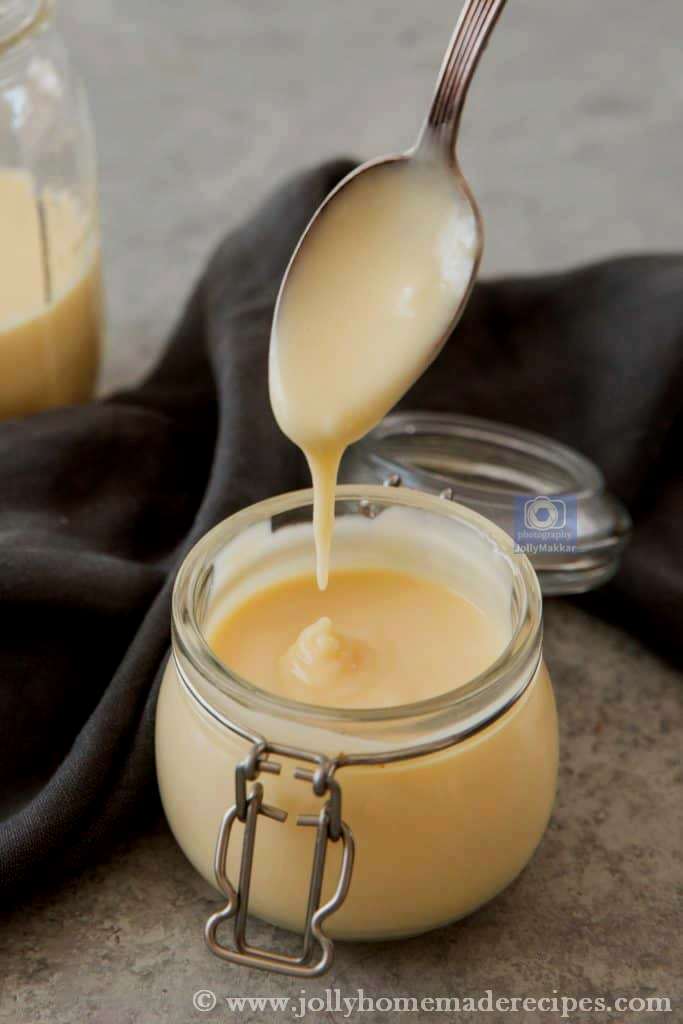
Homemade Condensed Milk Recipe | How to make Condensed Milk at Home | 3 Ingredients Condensed Milk(Video Recipe)

SUBSCRIBE & FOLLOW

POPULAR POSTS

  • Cinnamon Sugar Bread Crust Treats, Leftover Cinnamon Sugar Breadsticks Recipe
  • Meethi Seviyan without Milk | Dry Sweet Vermicelli | Meethi Sewai Recipe
  • Aloo Tamatar ki Sukhi Sabzi | Potato Tomato Stir Fry | Aloo Tamatar Ki Sabji
  • Rava Cake | How to make Sooji Atta Cake | Semolina Cake(Eggless)
  • Watermelon Granita | Easy 3 Ingredients Watermelon Granita
  • Vatana Batata Nu Shak | Gujarati Aloo Matar ki Sabji | Matar Aloo Curry
  • Shahi Phirni | How to make Best Phirni Recipe | Indian Royal Rice Pudding
  • Sooji Halwa Recipe, How to make Sooji ka Halwa - Ashtami Prasad | Indian Style Slow Cook Semolina Pudding
  • Urad Dal Ke Pakode | How to make Urad Dal Pakoda | Lentil Fritters
  • Homemade Condensed Milk Recipe | How to make Condensed Milk at Home | 3 Ingredients Condensed Milk(Video Recipe)

Search This Blog

Categories

  • 15 Minutes Recipes 39
  • A to Z Recipe Challenge 31
  • Bachelor Recipes 64
  • Collaboration 1
  • Curries & Lentils 26
  • Drinks & Beverages 47
  • Festival Recipes 55
  • Indian Breads & Parathas 25
  • International Cuisine 51
  • Kids Recipes 120
  • Navratri & Fasting Recipes 8
  • North-Indian Recipes 36
  • Pancake Recipes 12
  • Popular Indian Recipes 80
  • Tiffin Recipes 34
  • breakfast 101
  • sweets 55
  • vegan recipes 85
  • vegetarian 104

Blog Archive

Pinterest

Visit JollyHomemadeRecipes's profile on Pinterest.

Contact Form

Name

Email *

Message *

Powered by Blogger.
Protected by Copyscape Creative Commons License
This work is licensed under a Creative Commons Attribution-NonCommercial 4.0 International License

Copyright © ; Homemade Recipes. Designed by OddThemes | Distributed By Gooyaabi Template