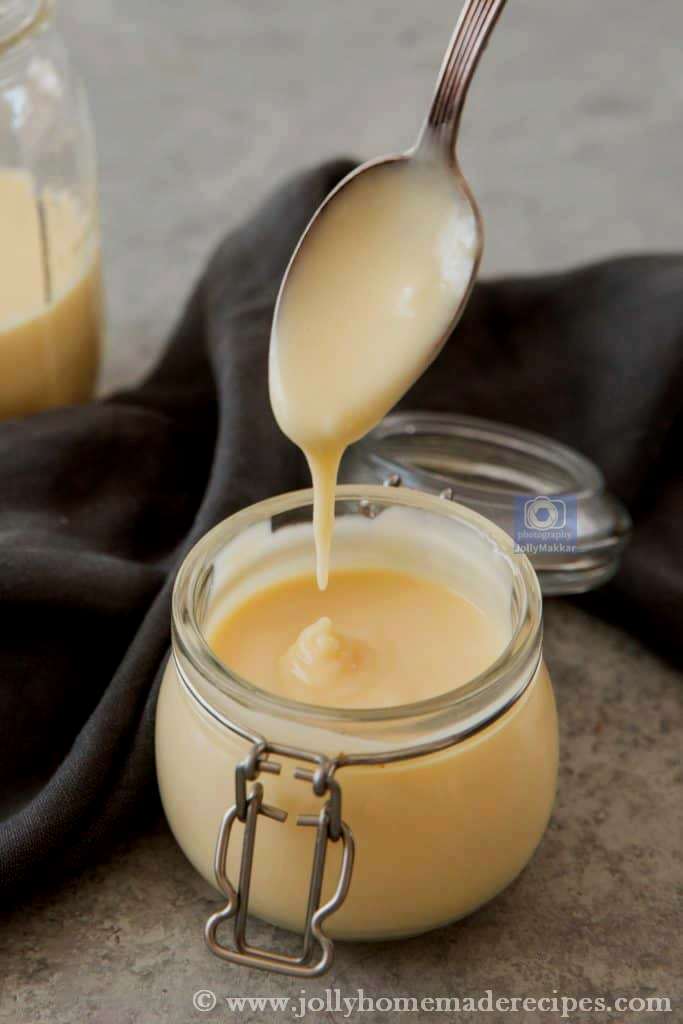
Tamarind chutney is a
popular Indian sweet and sour sauce made up with tamarind pulp,
sweetened with jaggery and other ingredients. An Indian snacks is
incomplete without the chutney's. This chutney is accompaniment with
chaats, bread pakoda or even spread on aloo ki tikki with dahi.
This sweet-sour chutney can be had for making chaat items like pani puri, aloo tikki and even samosa and aloo-paneer bread pakora. Its a one stop chutney recipe solution for all your chaat and fried savoury snacks. At my home, we usually eat with potato cutlets also, its taste great with tamarind chutney.
It has the sourness of tamarind balanced with the sweetness of the jaggery and the earthiness and mild hotness coming from the cumin and red chili powder. This chutney can be stored at room temperature for up to two weeks and a few months in the refrigerator. Stays good and taste remain same also.
if you are looking for more chutney recipes then do check coconut-tomato chutney, onion-tomato chutney, and coriander chutney.
Ingredients :
Tamarind pulp - 1 cup
Jaggery - ½ cup
Roasted n Crushed Fresh Cumin seeds powder - 1 tbsp
Chilli powder - As required
Salt to taste
Pinch of Dry Mango Powder(amchur)
How to make Roasted Cumin seeds powder ?
First roast the cumin seeds in a small saucepan/tawa over low heat and ground into a powder. The fresh aroma of roasted and grin cumin is awesome..i feel it now also.
Preparation Method :
1. Soak tamarind in a bowl full of water for 3 hours. Squeeze out all the tamarind juice.
2. In a small saucepan or
kadai over low heat combine tamarind pulp and jaggery. Cook until they
melt into a smooth sticky syrup.
3. Add chilli powder, salt to taste, roasted cumin powder and dry mango powder. Mix well, after few seconds, turn off the heat.
4. Your Tamarind Chutney is ready. Serve this chutney with samosa, chaats, bread pakoda and khaman dhokla.
if you are looking for more chutney recipes then do check coconut-tomato Chutney, sweet n spicy tomato onion chutney, red chutney and coriander chutney.
Happy Cooking & Enjoy :)
I love homemade cakes. How about you? Marble cake get its name for contrasting colors of light vanilla cake & swirled with rich chocolate ribbons.
The appearance is satisfying and flavors too are rich, moist and yummy. There's just something so appealing and festive about the beautifully marbled swirl that appears when you cut off a slice. Look below pic, swirls come out very well. .It was really yum can't express in words :D just out of the world :) :) My husband really liked it and he loves homemade cake too. I am so happy, my husband just like me, a typical foodie...lolzz ^_^ :D
Homemade cake was my favorite, when I was kid, my granny (grandmother) used to bake so many cakes using pressure cooker method as she did not have an electric oven at that time. I tried this cake today, but baked it in the pressure cooker to recall my childhood memories. In his cake, i didn't use any electric beater or taking help of any electronic device, just made this with purely with hand whisker.

This method has been tried and tested so many times in my house, I can assure you that your cake will turn out well.. Don't worry to those who don't have an oven..u can also bake a cake without an oven now..which gives same texture and taste..Let's start baking our marble cake in pressure cooker with step by step process with following pictures...
Ingredients :
All - Purpose flour / Maida - 1 cup
Caster Sugar - 3/4 cup
Butter, room temperature - 1/2 cup (or you can take vegetable oil with same quantity)
Eggs - 2 no
Cocoa powder - 3 tbsp
Vanilla essence - 1/2 tbsp
Baking powder - 1 tsp
Baking soda - 1/4 tsp
Milk - 3 tbsp
A pinch of Salt
1 heaped cup of salt while make baking
How to make Caster sugar at home ?
It's a very simple process - Add the sugar into the blender and pulse 15 times, or until the sugar becomes finely granulated.
Preparation Method :
1. Take a bowl, beat the butter and sugar until light lemon-colored and fluffy, and add a tbsp of oil in it in between and whisk it about 5 minutes.
2. Crack the eggs into a bowl and add the vanilla essence in it, whisk it. While the butter and sugar are creaming, Gradually add the eggs to the butter mixture, beating all the time...
( in 1st & 2nd pic - add the eggs in sugar batter, whisk it for few seconds then add the eggs again and whisk it (shown in pic 3 &4 ) and lastly add rest of the eggs in batter and again whisk beating well in between each addition and scraping the bowl as needed )
3. Measure out the flour, baking powder, baking soda and salt (sift all ingredients) into a small bowl and then add the milk and mix gently to combine with above batter.
4. Now we do, "Cut and Fold" method, I saw this tip in one of very fame English Food Channel "TLC"
In baking, "fold" is the term used for gently combining a delicate mixture into a heavier textured, thicker mixture in a way that will ensure that both mixtures are properly combined and ensuring that air bubbles in the lighter mixture are not burst by the heavier mixture.
Method : Take a rubber spatula or metallic spoon, Cut down through the center of the mixtures and bring the heavy mixture back up to the top, "down-across-up-and-over motion".
5. Divide the 1/2 of the batter to a separate bowl, mix the cocoa powder in it. Fold it using with above "cut and fold method" with very light hands.
6. Take a cake tin, brush with the melted butter evenly on the base and edges of the tin and also dust the inside of the tin with a little flour to help the cake can come outside smoothly from cake tin and not burn also.
7. Beginning with the vanilla mixture, place four spoonfuls of batter into the pan, spacing them far enough apart so that you can create a checkerboard when you add the chocolate batter. Add the chocolate batter into the empty spaces to fill the bottom of the pan in a checkerboard pattern. Repeat with the second layer, alternating the vanilla and chocolate batter. (see pics below)
8. Using the handle of a toothpick, swirl the batter to create a marbled effect.
9. Preheat cooker for cake, Take pressure cooker and put 1 cup salt all over. Heat the pressure cooker(empty) covered but without the pressure 3-4 minutes on a high flame, then place your cake tin.
10. Remove the gasket and whistle of pressure cooker.
11. Place you cake tin on top of the salt. Close the lid and turn the flame on low and let it cook for 45 minutes-1 hour.
12. After 45 minutes, take toothpicks, insert it in a cake, if it comes clean it means your cake is ready or if not you can cook for more 10 minutes.
13. Remove from cooker and let it cool down. Turn it upside down to De-mold (use knife all around the edges before turning).
14. Turn it again and let's Enjoy your Vanilla-Chocolate Swirled Marble Cake with your family and friends !!
Enjoy & Happy Cooking :)
Meethi Seviyan (Sweet Vermicelli) is a delicious Indian recipe served as a desert and made during festive occasion !! Seviyan in English known as Vermicelli they are like thin spaghetti and used many different ways, making sweet and savory dishes.
Today in Bangalore, mausam is awesome, so decided to make sweet & golden vermicelli for tea-time breakfast. Yummy !!! Felling hungry  Easy pudding made with vermicelli, dry fruits and other ingredients. We usually prepared this sweet dish in rainy days. Hot-hot sweet vermicelli is the best to served in breakfast also.
Ingredients :
Vermicelli / Seviyan - 1 cup
Sugar - 3/4 cup or adjust according to your taste
Water - 2 cup
Desi Ghee for frying - 3 tbsp
Raisins - 10-15 (wash and drained)
Chopped Almonds - 1 tbsp
Preparation Method :
1. In a heavy pot or kadai over medium heat, fry vermicelli in a tbsp of ghee, cook them, stirring constantly, till until golden brown about 2-3 minutes.
2. Carefully pour the water into kadai and add the sugar. Stir, bring the mixture to a boil, then lower the heat and simmer covered, until the vermicelli start to soften, 4 to 5 minutes. Add drained raisins and chopped almonds on to mixture as well.
3. Mix well and covered the lid for a few minutes.
4. Once water is soaked, remove from fire.
5. Serve Meethi Seviyan warm, garnish with pistachios and almonds.
Enjoy & Happy Cooking :)
 Punjabi dum aloo is one such flavorful dish. This is more restaurant style like and not spicy like the kashmiri dum aloo. This semi - dry curry just packs in all flavors from the freshly ground Indian spices, tang from tangy tomatoes and sweet hint from onions. It's very easy and quick to make.
There are some food that never go out of season or flavors and dum aloo is one of them. Dum Aloo is best served with roti's, paratha's or with butter naan. I served with simple roti , boiled rice and a side veggie salad. It is one the most popular dish in Indian Cuisine.
Potato is cooked in a rich buttery onion-tomato silky gravy and other Indian spices. This recipe is classic North-Indian dish served in restaurants but this is purely Homemade style. I learn this recipe from one of the food channel, just saw it and tried it at home and make very tasty. Me and my family especially my cook guru "My Mom" really liked it...feeling awesome =D 8-)
If you are looking for more aloo recipes then do check aloo ka bharta aloo-methi crispy aloo cheela, aloo-gobhi-matar and jeera aloo
Let's start the recipe of "Dum Aloo" with step by step process followed by pictures also, if you don’t do it properly, you won’t get the right flavors and taste in your final dish.
Ingredients :
Baby potatoes - 8 or 9 pieces
Finely Chopped Onions - 1 no (large-sized)
Finely Chopped Tomatoes - 2 no (medium-sized)
Yogurt / Curd - 4 tbsp
Slit Green chillies - 2 nos
Ginger-garlic paste - 1 tbsp
Cumin seeds - ½ tsp
Cloves / laung - 4
Black cardamom - 1
Cinnamon stick - 1
Salt to taste
Turmeric powder - ½ tsp
Red chilli powder / Paprika - ½ tsp
Coriander powder/dhania powder - 1 tsp
Garam Masala - ½ tsp
Water - 1 to 1.5 cup
Chopped Coriander Leaves for garnishing
Preparation Method :
1. In a deep dish with water, add about a teaspoon of salt and halve or quarter potatoes if big in size or keep them whole, boil it for about 10 to 12 mins. Drain all the water and peel the potatoes now.
Tips : Adding a salt in water while boiling potatoes, the skin should come off easily.
In the meanwhile, take a pan or kadai, add a tbsp of oil and a pinch of haldi/turmeric powder. I use the same kadai, which I used to make my gravy, you can use in different kadai or pan. Add the boiled potatoes and fry for a few minutes to get a nice golden color on the potatoes.
OR
You could also skip this step and instead follow the traditional method - rinse the baby potatoes and wipe them dry keep the peel on, halve or quarter them if big in size or keep them whole. Shallow or deep fry in medium hot oil till they are golden browned and completely cooked.
2. In a kadai, heat about 2 tbsp of oil. Add cumin seeds, cloves, cinnamon stick and black cardamom. Saute for a couple of minutes. Now, add ginger-garlic paste and saute for few minutes till its raw smell gone, then add chopped onions and green chillies.
Saute well for at least 6 to 8 mins until the onions are translucent or palely brown. Now add the spices, turmeric, coriander, red chilli, garam masala powder and salt. Saute for a couple of minutes, shown below in 1 or 2 pic
At this time, chop/dice the tomatoes and add to the onion mixture. Let cook until the onions are soft and tender. Turn off the gas and let the mixture cool for at-least 5 mins.(shown in 3 or 4 pic above)
3. In a blender, take the onion-tomato mixture and blend into a smooth puree.
Add about 1/2 cup water and 4 heaped tbsp of yogurt/curd. Further blend for a minute or so.
Empty the grave back into the skillet/kadai.
4. Add, the fried baby potatoes to the gravy skillet with remaining 1 cup water (make sure not add more than 1 cup), bring the gravy to a 1 boil in high flame.
Cover with a air-tight lid or place a lid and seal off the gaps with some dough(i used wheat flour dough) as shown in below pic Let the potatoes further cook in the gravy to take in all the flavors of the gravy.
Keep the stove on low-medium heat and let it simmer for 8 to 10 minutes till the gravy thickens.
5. Remove the lid, check for salt and adjust if needed. Turn off the gas.
6. Garnish dum aloo with some chopped coriander leaves and serve "Punjabi dum aloo" hot with roti's or steamed basmati rice.
Happy Cooking & Enjoy !!
 This sweet-sour chutney can be had for making chaat items like pani puri, aloo tikki and even samosa and aloo-paneer bread pakora. Its a one stop chutney recipe solution for all your chaat and fried savoury snacks. At my home, we usually eat with potato cutlets also, its taste great with tamarind chutney.


