Jolly Homemade Recipes

  • Home
  • About & Connect
  • Recipe Index
    • Cuisines
      • North Indian Cuisine
      • South Indian Cuisine
      • International Cuisine
      • Regional Indian Cuisine
    • Baking
    • Breakfast
    • Beverages
    • Curries & Lentils
    • Healthy Recipes
    • Kids Recipes
    • Rice Recipes
    • Vegan
  • Collaborations
  • Privacy Policy
  • Contact Us
Urad Dal Tadka
Dhuli Urad Dal with step by step recipe - A simple, healthy and wholesome everyday Punjabi  style urad ki dal that makes for a comforting side with warm rotis or paratha.

Urad Dal is a solid formula to make for any Indian vegan supper as it is stacked with Vitamin B, iron and other basic supplements. It is a rich well spring of veggie lover protein and can be a decent substitute for non vegan sustenance.

We are making urad into two variations, one is sookhi urad dal(dry version) and second one little bit curry it(we call gilli dal LoL it means little bit curry style).
Punjabi Urad Dal Tadka

There are many variations of preparing urad dal, this is the simple punjabi style dal variety which we prepared at my home. Just simply made using subtle spices such as cumin seeds, turmeric powder, this Dal turns to be homely and a meal that you can feed even to your kids without a worry.


What is Urad Dal and it's benefits?

Urad dal is called skinned and split black gram in English. The Dhuli dal is called husked split black lentil. Urad dal is totally gluten free. You can use this dal if you are gluten intolerant.

Urad dal is one of the richest sources of proteins and vitamin B, and is also beneficial for women. This simple lentil is full of iron, folic acid, calcium and potassium, which makes this dal a perfect healthy package for pregnant women.

Urad Dal

Popular in the Northern as well as the Southern states of India. Urad dal is easy to prepare and can be eaten as a side dish also. It is also extensively used in various culinary preparations such as dosa(see how to prepare dosa), papad and vada. 
The whole skinless black gram is used as a key ingredient in making the idli-dosa batter. 

8 Benefits Urad Dal [Split Back Gram] in your diet:

- Improves digestion
- Protects heart
- Boosts energy
- Improves bone health
- Strengthens nervous system
- Helps manage diabetes
- Reduces pain and inflammation
- Good for skin and hair

Dhuli Urad Dal


Urad dal has 3 varieties, 

1. Whole black gram (Popular dal makhani lentil) - The process of slow cooking dal lends it a unique flavor together with the Makhani (butter and cream) added at the end. 


2. Split black gram(Famous punjabi style Dal Amritsari)


3. Skinned and Split Black Gram (Urad dal making for healthy protein breakfast like dosa, pancakes, idli and many more)

Course : Main Course
Cuisine : North Indian (Punjabi)
Prep Time : 10 minutes
Cook Time : 20 minutes
Total Time : 30 minutes
Author : Jolly Makkar

Ingredients :

Dhuli Urad Dal/ Split gram lentil - 1 cup
Cumin Seeds/Jeera - 1/2 tsp
Fnely chopped Onion - 1/2 cup
Chopped tomatoes - 1/2 cup
Finely Chopped garlic - 1/2 tsp
Finely chopped Ginger - 1/2 tsp
Turmeric powder/haldi - 1/2 tsp
Red chilli powder/mirchi - 1/4 tsp
Coriander powder/dhaniya - 1/4 tsp
Garam masala - 1/4 tsp
Salt to taste
Desi Ghee / Clarified butter- 3 tbsp
Chopped Fresh coriander -  2 tbsp
Water - 3 cups

Preparation Method :
1. Wash the dal under running water till water runs clean and soak it in enough water for 30 minutes. Drain the water and add the dal in a pressure cooker.


Note* Always wash the dal with normal water first and then drinking water

2. Add turmeric powder, salt along with 3 cups of water. Pressure cook for 3-4 whistles or until the urad dal is cooked.

3. Remove the cooker from heat and let the pressure release.

4. Mash the dal using the back of a ladle. Add more water if required(don't mash too much).

5. Heat ghee in a pan and add cumin seeds, when the cumin seeds start spluttering add ginger, garlic and onion. Saute till the onions turn golden brown in color.  

6.  Add chopped tomatoes and the rest of the spices turmeric powder, the remaining red chilli powder, coriander powder and saute until ghee oozes out from the masala or till the tomato becomes mushy.

7.  
Pour the cooked dal from the pressure cooker along with the cooked water. Do not add the liquid at first. Crush(mash) the dal with the back of the ladle while stirring continuously, this gives that creamy texture to the dal and simmer it on low flame for 5 minutes. Do stir in between.

8. Lastly check the salt, if it is required add it with garam masala, chopped coriander leaves and mix well.

9. Serve the dal with hot roti, pickle, papad and side salad or fruits.

Tadka Urad Dal

Did you make this recipe?

Tag #jollyhomemaderecipes or follow us for more updates on
 
Facebook | Instagram | Pinterest | Twitter

With your pictures, I would love to see your delish creations!


PIN IT Later for future use


Happy Cooking & Enjoy !!
Meetha Amba Khatta
How to make Odia Amba Khatta with step by step photos recipe - Amba Khatta is a lip-smacking, delicious, sweet, tangy, spicy chutney made with raw mangoes, sweetened with jaggery, flavored with curry leaves(kadi patta) and spiced with cumin seeds, and red chilli powder.

This chutney is a typical Odia style dish which is must prepared in functions especially during marriages and pooja. In Odia, Mango is known as "Amba" , Meetha means "Sweet" and Khatta means "Tangy"...so this sweet and sour chutney,

For me, it's an instant sweet and raw mango pickle, I have used skin of raw mangoes, because I want to enjoy the whole mango pieces. The actual recipe used skin also..if you don't want you can peel the skin also. The skin of raw mangoes won't so soft as mango pickles after making but after few days it becomes so soft.

Instant Sweet and Sour Raw Mango Relish


This Green Mango bought all the memories back to me during my school days. The outside of school all stalls with cut green mangoes sprinkled with salt and red chilli powder were abundant back home.

For healthy reason, mangoes not only help in reducing cholesterol but they are also good for our eyes and skin. Mangoes increase our immunity level and good for digestion.
 
This is a must try for mango lovers. This is quick and easy to cook and get cooked within 10-15 minutes. It is a perfect side dish for this summer season with my all meals. You can serve it with paratha, or flavored poori or roti or rice too.


Do you know this chutney is tastes much better on next day of the preparation. Everyday the flavor of amba khatta is more relish. I'm sure you'll loved it just like me.:)

I made this recipe as part of Recipe Swap challenge, where we get one partner blogger every alternate month...we visit so many blogger pace and we try to bookmark their recipes but never really find the time to try it. This time I have added the small idea behind this challenge, to try the "Regional Cuisine" and this time my partner is my partner is Sasmita Sahoo who belongs from Orissa and who blogs at firsttimercook.com

Odia style Swee and Sour mango chutney


This is my 5th recipe under this challenge 
first is green gram dosa
second is eggless carrot cake
third is shortbread jam thumbprint cookies
fourth is sambar powder

You can make a big batch and keep enjoying with your daily meals like as I am doing. I made a small batch for my sister also and she really liked the chutney and demanded for the next batch :D..

This Raw mango chutney is a delicious vegetarian side dish. It is famous Odissa style chutney which goes well with all savory dishes. 

Odia style Amba Khatta
You can even try more chutney's during this summer time like aam ka chunda,

Let's start to make this easy and quick kache aam ki khatti meethi chutney recipe step-by-step photos process.

Author : Jolly Makkar
Prep Time: 5 minutes
Cook Time: 10-15 minutes
Total Time: 15-20 minutes
Course: Accompaniment(Pickles and Chutneys)

Cuisine: Odia (Indian)
Recipe adapted from FirstTimerCook

Ingredients :

Roughly chopped Raw mangoes - 2 nos
Roughly chopped Jaggery - 1/3 cup
Grated Ginger - 1/4 tsp
Cumin seeds - 1/8 tsp
Mustard seeds - 1/8 tsp
Dry red chillies - 1 no
Finely Chopped Green chillies - 1 no
Curry leaves - few
Turmeric powder - 1/4 tsp
Red chilli powder - 1/4 tsp
Salt to taste

Cumin - Chili powder [Roasted] - 1/4 tsp
Water - 1 cup
Cooking Oil - 1 tsp

Preparation Method :

1. Wash and clean the raw mangoes. Chop all the mangoes into cubes and discard the seeds.

cubes of raw mango

2. Heat oil in a pan. Add dry red chili, cumin seeds, mustard seeds and allow to splutter.

3. Next add grated ginger and finely chopped green chili along with curry leaves. Saute a bit.

4. Then add raw mango cubes, saute for a few seconds. Add turmeric powder, red chili powder, salt and mix everything well.

making of amba khatta

5. Next add sugar / jaggery and mix again well and allow to cook for 5-10 minutes.

6. Add 1 cup of water and allow to boil and cook till mango pieces are soft enough.

preparation of amba khatta

7. Switch off the flame and sprinkle roasted cumin-red chili powder.


8.
Serve this chutney as a side condiment with any meal or you can also have it dahi methi poori, poha missi roti, and many more.

Did you make this recipe?

Tag #jollyhomemaderecipes or follow us for more updates on
 
Facebook | Instagram | Pinterest | Twitter

With your pictures, I would love to see your delish creations!


PIN IT Later for future use

Odia style Meetha Aamba Khatta_Pinterest

Happy Cooking & Enjoy !!
Cantaloupe Granita
How to make Cantaloupe Granita recipe - It’s been hot and sunny here in Bangalore and I’ve been craving cool treats most afternoons so I’ve made this refreshing Cantaloupe Granita. Simple and easy frozen dessert for your summer cravings 😊! This is a great way to keep the summer going.

A healthy and low fat summer treat. They’re super easy to make and so fun and very refreshing. This one is no exception.

Yes, definitely not the most healthy choices, but those were our favorites.The cantaloupe and lime are a great combo with the added benefit of being extra cooling for these hot summer days.Enjoy!!

Cantaloupe Granita Recipe

Now that summer is almost here, it’s time to start thinking about barbecues, picnics, and but I love all these outdoor festivities and get-together's, my favorite part of warmer weather is definitely all the frozen treats like Popsicle, whenever we go outside for having ice-cream i would love to eat frozen Popsicle rather than milk one, sometimes I eat orange, mango :) :)


Unlike Popsicle and ice cream which require additional tools or equipment, very little is needed to make granita at home. All you really need is a baking dish (such as bread loaf pan or casserole dish) and a freezer. That's it !!

What is Granita ?

Granita is the sophisticated, well-traveled older sister of slush and shaved ice. But don’t worry, granita making is not that complicated. It’s actually quite easy and simple to make but ya it takes some time to make. No special tools needed to make granita!


With melons, strawberries all juicy fruits season in full swing, my fridge is stocked up with both the melons - muskmelon(cantaloupe) and next watermelon too. Luckily I’ve found the best way to use them all up: cantaloupe granita! This time I've choose muskmelon to make this and next time for sure watermelon😁😁!!

You can use any freezer safe dish for granita. I used a metal bread loaf pan because it fits nicely in my freezer. You can use casserole dishes, baking pans, or pie tins.

How to make Melon Granita

Since I used a loaf pan, it took a little bit longer for the granita to set up. Just remember, the larger the surface area and shallower the pan, the quicker the granita will freezer. 


After about an hour, the mixture will look creamy like a sorbet. After about 90 minutes, it should more like shaved ice.


To make the liquid base, I blended together fresh cantaloupe, some water and simple syrup. Pour the liquid into your desired dish and place it in the freezer. Check on the mixture every 30 minutes. Each time, remove the dish from the freezer and scrape up any icy bits have begun to form.
 
That’s it! In about 2 hours, you’ll have this delicious and refreshing melon granita.

I was a bit intimidated to make a granita—this was my third..Earlier I've tried with mangoes sorbet and pomegranate, this time with cantaloupe—but it was truly the most simple frozen treat imaginable. No fear necessary, just hungry anticipation.

Musk Melon Granita Recipe


You can even also try summer recipes from my blog like mango ice cream with tutti frutti, pineapple punch, mango lassi, cucumber lassi,  barfi kulfi,

Prep Time : 5 minutes
Freezing Time : 4 to 5 hrs or Overnight for best results
Course: Dessert / Frozen Treat
Cuisine: International
Serves: 3
Author : Jolly Makkar

Ingredients:

Fresh cantaloupe, peel, chopped and sliced - 1 pound
Lemon juice - 3 Tablespoon
Water - 1/4 cup
mint leaves for garnishing (optional)

Simple Syrup:

Water - 1 cup
Granulated sugar - 1 cup

**For Simple Syrup**

1. Combine water, and sugar in a saucepan. Bring to a simmer and continue to heat until sugar has dissolved. Remove from heat and allow to cool to room temperature. Strain out (if there is any impurities) and store simple syrup in the fridge until ready to use. Keeps for one week.


Preparation Method :

1. In a blender, combine sliced cantaloupe, lemon juice, and water. Process until smooth. Add simple syrup, stir to combine. Taste and adjust sweetness by adding more syrup if necessary.

2. Pour liquid mixture into a freezer safe pan*. Freeze for 30 minutes. Remove from freezer and use a fork to stir up icy liquid.

3. Return to freezer and remove every 30 minutes to scrape contents. It should take about 90 minutes to 2 hours until the mixture has turned into ice crystals and looks like an icy slushy. 


4. Serve immediately, or cover and enjoy later. Garnish with fresh mint leaves.

 Musk Melon Granita

Did you make this recipe or tried it?

Tag #jollyhomemaderecipes or follow us for more updates on
 
Facebook | Instagram | Pinterest | Twitter

With your pictures, I would love to see your delish creations!


PIN IT Later for future use
How to make Musk Melon Granita Recipe
Cheers & Enjoy 😍😍
Newer Posts Older Posts Home

Page views

About Me

About Me
Hello. I'm Jolly Makkar, a food blogger, a mommy of 1 son and nature lover. Thank you for stopping by! Welcome to my Food Blog.

my favorite recipes

  • JollyHomemadeRecipes
  • JollyHomemadeRecipes

Featured Post

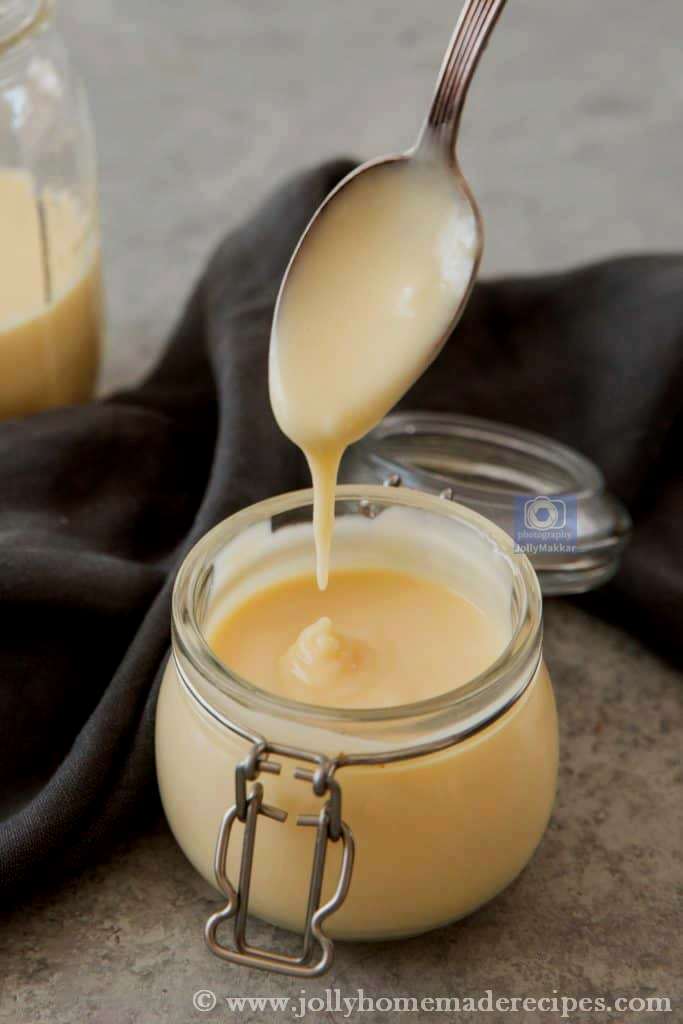
Homemade Condensed Milk Recipe | How to make Condensed Milk at Home | 3 Ingredients Condensed Milk(Video Recipe)

SUBSCRIBE & FOLLOW

POPULAR POSTS

  • Meethi Seviyan without Milk | Dry Sweet Vermicelli | Meethi Sewai Recipe
  • Rava Cake | How to make Sooji Atta Cake | Semolina Cake(Eggless)
  • Watermelon Granita | Easy 3 Ingredients Watermelon Granita
  • Shahi Phirni | How to make Best Phirni Recipe | Indian Royal Rice Pudding
  • Aloo Tamatar ki Sukhi Sabzi | Potato Tomato Stir Fry | Aloo Tamatar Ki Sabji
  • Sooji Halwa Recipe, How to make Sooji ka Halwa - Ashtami Prasad | Indian Style Slow Cook Semolina Pudding
  • Moong Masoor Dal Khichdi | Dal Khichdi Recipe | Easy Khichdi Recipe
  • Cinnamon Sugar Bread Crust Treats, Leftover Cinnamon Sugar Breadsticks Recipe
  • Paneer Kheer | How to make Paneer Kheer
  • Creamy Cantaloupe Smoothie Recipe, How to make Muskmelon Banana Smoothie

Search This Blog

Categories

  • 15 Minutes Recipes 39
  • A to Z Recipe Challenge 31
  • Bachelor Recipes 64
  • Collaboration 1
  • Curries & Lentils 26
  • Drinks & Beverages 47
  • Festival Recipes 55
  • Indian Breads & Parathas 25
  • International Cuisine 51
  • Kids Recipes 120
  • Navratri & Fasting Recipes 8
  • North-Indian Recipes 36
  • Pancake Recipes 12
  • Popular Indian Recipes 80
  • Tiffin Recipes 34
  • breakfast 101
  • sweets 55
  • vegan recipes 85
  • vegetarian 104

Blog Archive

Pinterest

Visit JollyHomemadeRecipes's profile on Pinterest.

Contact Form

Name

Email *

Message *

Powered by Blogger.
Protected by Copyscape Creative Commons License
This work is licensed under a Creative Commons Attribution-NonCommercial 4.0 International License

Copyright © ; Homemade Recipes. Designed by OddThemes | Distributed By Gooyaabi Template