Aloo Matar Paneer Recipe | Punjabi style Aloo Matar Paneer | Potato, Cottage Cheese & Green Peas Gravy | How to make Punjabi style Aloo Matar Paneer Recipe | How to make Aloo Matar Paneer Recipe
Aloo Matar Paneer Recipe with step by step photos - A traditional Punjabi recipe of aloo-matar-paneer are cooked in onion-tomato based gravy with Indian spices. It is a flavorful and creamy staple food at our home.
This is personally mine and my family favorite dish, so this is prepared in our lunch menu or sometimes dinner menu with rice or roti at-least weekly or bi-weekly.
Aloo are potatoes, Matar are peas and Paneer are cottage cheese hence the dish is called as Aloo Matar Paneer recipe. My vegan friends could skip Paneer from the recipe, they can substitute with tofu.
Paneer is a versatile ingredient which is used for making sweets, cakes, gravies, sandwiches and fritters etc.
Potatoes, cottage cheese and green peas cooked in a flavorful onion and tomato based gravy. It goes very well with any Indian bread like paratha, poori or even tandoori naan. This is very simple homely dish and a very comfort meal too !!
This curry recipe again another dish is adapted from my mother's kitchen, I must say my mom is a superb chef <3 <3 and her recipes are so simple, easy and very delicious made with basic ingredients which is easily available in our Indian kitchen. This is classic northindian Punjabi recipe which we make.
If you are looking for more aloo recipes then do check
aloo rasedar
jeera aloo
punjabi dum aloo
aloo gobi matar
aloo ka bharta
Let's start to make this easy and simple recipe of Punjabi style aloo matar paneer with simple step-by-step process.
Cooking Time : 15 minutes
Preparation Time : 15 minutes
Cuisine : North-Indian, Punjabi
Ingredients :
Paneer (cottage cheese) - 250 grams
Fresh/frozen peas or matar - 1 cup
Potatoes - 2 to 3 medium sized
Turmeric powder (haldi) - 1/4 teaspoon
Red chili powder (lal mirch powder) - 1/4 to 1/2 teaspoon
Garam masala powder - 1/4 to 1/2 teaspoon
Coriander Powder(dhaniya powder) - 1/4 to 1/2 teaspoon
Salt as required
Oil - 2 to 2.5 tablespoon
Water - 1 to 1.25 cup
Chopped Coriander leaves (dhania patta) for garnishing
Ingredients for Masala Paste:
Tomatoes(roughly chopped) - 3 medium sized
Onion(roughly chopped) - 2 medium sized
Chopped 1 to 2 green chilies/hari mirch (optional)
Chopped Ginger (adrak) - 1/2 inch
Chopped Garlic (lahsun)- 3 to 4 nos
Preparation Method :
1. Blend all the ingredients mentioned under "masala paste" in a grinder or blender to a smooth paste. No need to add water while grinding and keep it aside.
2. Heat oil in a pressure cooker. Add grind-ed onion-tomato masala in it, mix it well. Add all the dry spice powders - turmeric powder, red chili powder,coriander powder and stir well. Saute for 10-12 minutes or more on a low to medium flame till the oil separates from the paste.
3. Add the chopped potatoes or aloo, peas or matar and paneer or cottage cheese. Stir again.
4. Add water and season with salt.
5. Cover the cooker tightly and pressure cook till the aloo,matar and paneer are cooked. Cook for about 2 to 3 whistles or 9 to 10 minutes.
6. When the pressure drops on its own, open the lid of the pressure cooker. If the curry appears thin, then simmer till it reaches the desired consistency....the consistency is medium and neither thick nor thin.
7. If the gravy appears thick, then add some water and simmer. Add garam masala powder and chopped coriander leaves.
8. Serve aloo-matar-paneer with rotis, tawa naan or rice, salad and pickle as a side accompaniment.
Happy Cooking & Enjoy !!
Dhaba Style Chicken Curry with step by step photos recipe - Very easy and simple recipe to follow. This chicken is delicious curry from northern India...flavored with aromatic spices in onion-tomato base thick gravy, that is mildly spicy and tastes great with Naan or Paratha or Rice.
Dhaba pronounced as “Dha-bah” refers to roadside restaurants which are situated on highways and generally serve local cuisine.
They are most commonly found next to petrol stations, and most are open 24 hours a day. The word dhaba has come to represent any restaurant that serves Punjabi food, especially the heavily spiced.
I am from North India, before my marriage when we visit to our mama and massi place towards Punjab that time we enjoy the taste of authentic dhaba food..The journey between my hometown to Chandigarh, lots of dhaba will come.
It has been a while since I had posted a Indian curry recipe in my blog. This is my style of dhaba style chicken curry with less spicy according to my family taste.
Also if you are looking for the thick gravy chicken curry types that you usually get in restaurants, give this one a try. I’m sure you will not be disappointed.
It’s a pretty basic and simple chicken curry, but the process gives it a whole different look and feel. Hope you also enjoy it :)
You can try end number of chicken curries
Murg Musallam
Chicken Tikka Masala
Tangdi Kabab
Achari Murg
Tandoori Masala Powder
Let's start the process of dhaba style chicken curry with step by step method.
Ingredients :
1 kg chicken Skinless , cleaned and cut into medium sized pieces
For the marinade:
Curd / Dahi - 1/2 cup
Ginger Garlic paste - 2 tablespoons
Red chili powder - 1/2 tablespoon
Turmeric powder - 1/4 tablespoon
Coriander powder- 1/2 tablespoon
Tandoori Masala powder - 1 tablespoon(optional, I used it in marinate the chicken only)
Salt to taste
For the Curry :
Chopped Medium sized Onion - 4 no (puree) + 1 small sized thinly sliced (for curry)
Chopped Medium sized Tomatoes - 4 no(puree)
Garlic cloves - 7-8 no
Piece of Ginger - 1 and 1/2 inches
Green Chilies - 1 - 2(Adjust the spice as required)
Dry Spices :
Cumin Seeds/Jeera - 1 tablespoon
Bay leaves/ Tej Patta - 2
Cinnamon Stick/Dalchini - 1/2 inch
Cardamom pods/Elaichi - 4 no
Peppercorns / Kali mirch- 8 - 10
Cloves /Laung - 4 - 5
Indian Masale for curry :
Turmeric Powder - 1/2 teaspoon
Red chili powder - 1 teaspoon (optional; adjust the spice as required)
Coriander Powder - 2 tablespoons
Garam masala powder - 1 teaspoon
Salt to taste
Coriander leaves for garnishing
Cucumber Sticks as a side salad with chicken curry
Peeled and sliced lengthwise Cucumber : 2 no medium sized
Sprinkle Black Salt to taste, Red chili powder and squeeze with lemon juice, toss it with light hands and Serve it with your chicken curry !!
Preparation Method :
1. Marinate the chicken pieces with ginger garlic paste, curd and all spices mentioned above. Cover and set aside for 1 hour.
2. Grind onions, ginger, garlic and green chilies to a fine paste. Set aside.
3. Heat oil in a large heavy bottomed pan/kadai or pressure cooker. Add cumin seeds when it splutter add 1 medium sized sliced onions. Roughly pound all the whole spices (bay leaves, cinnamon, cardamom, peppercorns and cloves) and add to the oil.
4. Once they start to splutter, add the onion paste. Cook the onion paste on a low flame, stirring occasionally, till it is reduced to a golden, brown paste and the oil starts to surface.
5. Add tomato puree, salt, turmeric powder, red chili powder (if using) and coriander powder. Cook this paste for few seconds till the oil leaves around.
6. Add the chicken, garam masala and 1/2 cup of water and bring the curry to a boil, reduce the heat, cover with a lid and let it cook on medium heat for 20-25 minutes.
7. Uncover the pan, and cook for another 15-20 minutes till the water evaporates and the curry starts to thicken.
OR If You are using Pressure Cooker : All steps are same till step 5
6. At this stage, if you are using a pressure cooker, place the lid and pressure cook for 3 whistles. Switch off the flame and let the steam escape before opening the cooker.
7. Simmer for 5-10 mins on high flame, if required, to thicken the curry (chicken leaves a lot of water). I didn't need to do this.
8. Once the curry is ready, switch off the flame. Garnish with chopped coriander/cilantro leaves and
9. Serve with hot naan or roti or good going with boiled white rice.
Did you make this recipe?
Tag #jollyhomemaderecipes or follow us for more updates on
Facebook | Instagram | Pinterest | Twitter
With your pictures, I would love to see your delish creations!
PIN IT Later for future use
Happy Cooking & Enjoy ! !
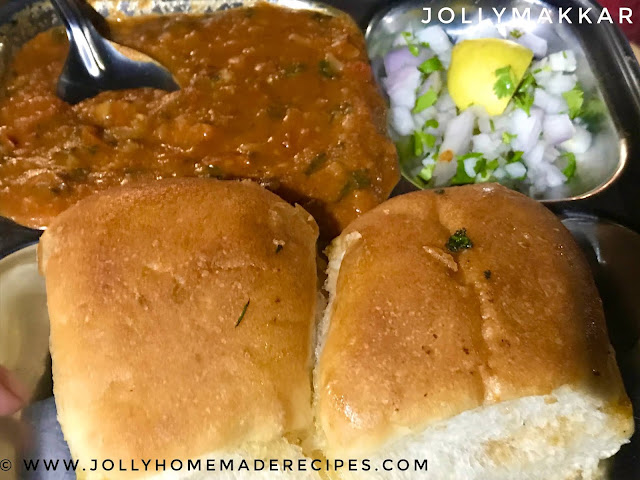
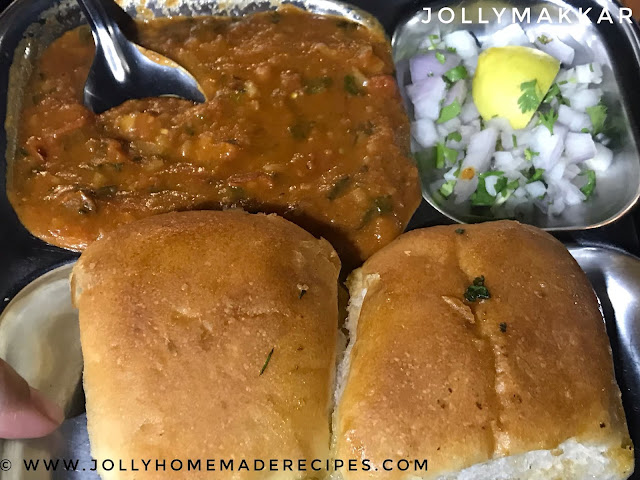
Pav Bhaji Recipe with step by step photos – Pav Bhaji is one of the most popular Mumbai street food.
'Pav' means a bun shaped bread. 'Bhaji' means mashed vegetables blended with Indian spices and butter.. yummm !! Now-a-days it become famous street food around the world.
Me and my husband really fond of street food and mostly pav bhaji. Last week, we both starved of having pav bhaji, so we went outside just to eat this but it's our bad luck, everything is finished, my husband becomes upset :(
so, that time I decided to make pav bhaji at home, next day in dinner when he come back from office and gave him a surprise with homemade Mumbai style pav bhaji. He is really happy to have this pav bhaji <3 :)
It’s one of the most simplest dishes to make on earth.
You got to add loads of amul butter in pav bhaji but those who are not eating amul butter they can also use white butter in it.
However I love my pav bhaji with Utterly-Butterly Delicious Amul Butter. :)
This recipe taken the idea from Tarla Dalal ji and I have done little bit modification in it & I have not added garlic and red chilli paste into it, if you add it the pav bhaji...color changed into red and more spicy also. At my home, we don't eat more spicy food, so I avoid it and made this super yummy pav bhaji at home in my own style.
Let's start step by step Mumbai style pav bhaji recipe with step by step photos
Ingredients :
For the bhaji
Potatoes, boiled and mashed - 1+1/2 cups
Boiled Green peas - 1/2 cup
Finely chopped onion - 1 cup
Finely chopped capsicum - 1/2 cup
Finely chopped tomatoes - 2 cups
Ginger-Garlic paste - 1/2 tsp (optional)
Jeera - 1/2 tbsp
Turmeric powder (haldi) - 1/2 tsp
Red chilli powder - 1/2 tsp
Pav bhaji masala - 2 to 3 tbsp (according to your taste)
Salt to taste
Butter - 4 tbsp
Oil - 1 tbsp
Water - 1/2 cup
For the pav
Pav's - 8 to 10 nos
Amul Butter - 4 tbsp
For serving
Small sized onion - 1 no chopped in rings
Lemon wedges - 4
Chopped coriander (dhania) - 1 tbsp
Preparation Method :
For the bhaji
1. Steam all the vegetables except onions, tomatoes and green capsicum in a pressure cooker. The vegetables have be to cooked completely.
2. Peel the boiled potatoes. Mash the boiled peas & potatoes and keep aside. Just lightly mash with a potato masher or with a spoon.
3. Heat the butter and oil (here you can avoid oil, just add butter also) in a large pan/wok/kadai.
Add cumin seeds. When they sizzle, add the chopped onions.
4. Fry the onions till they become translucent.
5. Now add the ginger-garlic paste. Saute till the raw aroma of the ginger-garlic paste disappears.
6. Add the chopped capsicum. Saute for 2 to 3 minutes.
7. Add the tomatoes and Saute till the tomatoes become soft and mushy and you see the fat from the sides. About 6 to 7 minutes on a low to medium flame.
8. Add the turmeric powder, chilli powder, pav bhaji masala and cook for 2 to 3 minutes.
9. Stir and saute for a 1 to 2 minutes till the chopped capsicum softens a bit. You don’t need to cook the capsicum till very soft.
10. Add the boiled mashed peas-potatoes mixture and Combine the mashed vegetables well with the masala.
11. Add water and combine everything well. Season with salt. With a potato masher, mash the veggies directly in the pan.
12. Keep on stirring occasionally and let the bhaji simmer for 12 to 15 minutes on a low flame.
Tip
* If the bhaji becomes dry and then add some more water. The consistency is neither very thick nor thin.
13. Add 1 stick of butter into bhaji. When the pav bhaji simmers to the desired consistency, check the taste. Add salt, pav bhaji masala, red chili powder or butter if required.
14. When done, garnish with coriander leaves. Serve with onions rings and lemon wedges.
15. While serving, add amul butter to the bhaji and serve with buttered pav's.
You can add more butter, if you like it. In fact, with more butter, the pav bhaji tastes very good....while writing I'm feeling hungry :D :)
For the pav
1) Slice each pav into 2 horizontally.
2) Apply a little butter to each side and when the butter melts, keep the pav's on the melted butter so that it absorbs the butter and fry for a minute.
If you are looking for more street food recipe then do check Bombay toast, Papdi chaat, Mumbai tawa pulao, moong dal ke ladoo and many more...
Happy Cooking and Enjoy !!
Gur Papdi Recipe | How to make Gud Papdi Recipe | Gujarati Sukhdi Recipe | Gud Papdi Recipe | Gujarati Gol Papdi Recipe | Whole Wheat Flour & Jaggery Fudge
Gur Papdi Recipe with step by step photos - A traditional rich Indian desert made from whole wheat flour(atta), jaggery(gud), desi ghee(clarified butter) and some crunchy nuts(dry fruits). This is very popular sweet-dish from Gujarat. It is also known as Sukhdi, Golpapdi or Gudpapdi. The appearance is satisfying and flavors too are rich, soft, crumbly and melt in your mouth.
As Diwali is nearing, you can include this easy peasy sweet recipe in your festive menu. With just 3 ingredients, it tastes awesome! It can be done under 15 minutes.
It is a delicious desert is often made for an auspicious occasion or a pooja, it could also be a festive occasion like Diwali,
bhai dooj or any religious ceremony conducted in our home or simply make them for any celebrations and enjoy them. This is one of the most favorite sweet at my home.
It is very healthy and easy to make. Gur Papdi can stay for long enough,we can carry them while travelling also. In the below picture you can see how perfect and melt in mouth the gur papdi have come out.
Although sweets will be easily available in your nearby sweet shop but the one’s you make yourself at home taste even sweeter. Be soft and gentle with them and they will be softer and more tasty !!!
There are many variations of making gur papdi, I am sharing one of my favorite recipe, if you don't like nuts so you avoid it or if you don't like cardamom powder in your sweet dish, avoid them too !!
There are a lots of traditional delicacies that are relished on this Festival and making the occasion even more enjoyable. Here are some selected recipes to help you celebrate the festival.
Try these simple recipes and make place in the hearts of your loved ones...
Preparation time : 5 minutes
Cooking time : 10 minutes
Cuisine : Gujarati, Indian
Ingredients :
Whole wheat flour /Atta - 2 cups
Ghee / Clarified butter - 1 cup
Grated jaggery/ powdered gud - 1 cup
Sliced almonds and pistachios- 1/4 cup( and more for garnishing)
Cardamom powder - 1/4 tsp
Nutmeg powder - 1 pinch
Preparation Method :
1. First prepare the tray or thali to set the gur papdi. Grease the plate well using with ghee.
2. Heat ghee in a heavy bottomed pan or kadai. Add sieved wheat flour to it and roast it on a medium flame.
3. Stir constantly for 4 to 5 minutes or till the atta/flour change the light brown in color or also you get nice aroma in your kitchen. Switch off the flame.
4. Allow this to cool slightly. When it is lukewarm, add grated jaggery and mix well until combined.
5. Add cardamom powder and nutmeg powder and mix well.

6. Transfer this mixture into a greased tray. Sprinkle diced nuts onto it, press and level it using the back of a spoon.
7. Cut into diamond or your choice of shapes. Allow it to cool completely before transferring on to a serving tray or an airtight container.
8. Serve it warm to your family or let it completely cool down store it in air tight container and then serve as required.
Tips for making gur papdi
* Gur papdi always taste best when its warm. You can store this for 15-20 days easily at room temperature.
* To make sure the gur papdi doesn't get chewy, always switch off the stove and then add jaggery.
* Always make sure you grate the jaggery it will prevent from any lumps formation.
* When it's warm cut it into desired shape (square /diamond).
Happy Cooking & Enjoy !!


