Jolly Homemade Recipes

  • Home
  • About & Connect
  • Recipe Index
    • Cuisines
      • North Indian Cuisine
      • South Indian Cuisine
      • International Cuisine
      • Regional Indian Cuisine
    • Baking
    • Breakfast
    • Beverages
    • Curries & Lentils
    • Healthy Recipes
    • Kids Recipes
    • Rice Recipes
    • Vegan
  • Collaborations
  • Privacy Policy
  • Contact Us
Pomegranate Granita recipe with step by step process - It is simple, light and delicious dessert. Pomegranate is a wonderful and very healthy fruit. 

Pomegranate is rich in antioxidants and other essential nutrients which prevents premature skin aging and keep the complexions smooth and radiant. 

Apart from this, in general, pomegranate is an extremely healthy fruit with lots of other health benefits too. 

Pomegranate are easily available in supermarkets throughout the year these days, otherwise earlier it comes in peak season coming in October to January. Pomegranates are a rich source of potassium. 


Granita is similar to sorbet, it's chunkier and has lots of lovely crunchy ice crystals to munch on (with sorbet you blend the frozen mixture halfway through freezing). This will be covered in the freezer for 2 to 3 days, at my home it's finished in 1 day only :P :D :)

If you are looking for more Vrat/Fasts recipes then do check

Barnyard Millet Khichadi/ Sawang Rice Khichdi

Sweet Lassi
Sabudana Khichdi
Kaddu ki Sabzi

Aloo Cheela 
Sweet Raita

Let's start the process of easy-peasy creamy pomegranate granita recipe with simple step by step method -

Ingredients :

Pomegranate - 1.5 cup juice (about 2 cups of fruit)
Water - 2 tbsp
Lemon Juice - 1/2 tsp
Mint leaves for garnish

Pomegranate arils for garnish
 
For Sugar Syrup
Sugar - 1/4 cup (adjust per taste)
Water - 1/4 cup (mine pomegranate is less sweet, so I take 1/4 cup of sugar, if your fruit is too sweet then add less amount of sugar


Preparation Method :

1. First, remove the pomegranate aril (pearls of seeds with pulp) from the fruit.


2. Bring the sugar and water to boil stirring to dissolve the sugar, set aside to cool down.


3. Process the pomegranate arils to a blender with little water and blend well. Pass through a fine mesh sieve to remove the seeds, and transfer the pure pomegranate juice to a large pan.


4. Mix the pomegranate juice and simple sugar syrup. Now add lemon juice and mix well.

5. Pour the mixture into a large pan or ceramic dish. Put into the freezer and every 1 hour, stir and scrap the mixture with a fork. 


6. Again, place back the pan into the freezer for 1 more hour. After the second 1 hr, again pull out the pan and use a fork to scrape the ice crystals. Repeat the same process, for a third time. Freeze it overnight.

7. Now, freeze the granita for 1 final hour until nicely solid or you can leave it overnight.
By now the granita should be flaky as seen in the pic.
Right before serving, pull the pan out of the freezer, use a fork to scrape the ice. Spoon it in serving glasses.

9. Enjoy cold. Garnish with some pomegranate arils, mint leaves and a slice of lemon.


10. Serve the granita immediately after pulling out of the freezer. It will melt quickly.


To PIN it Later


Happy Cooking & Enjoy !!
Coriander Chutney recipe step by step process : This is very easy and tasty indian dip that goes very well with your side meal as a side accompaniment or with snacks or starters 

I love to eat it with my every meals. This chutney is prepared with coriander leaves, onions and other ingredients. 

This chutney is perfect dipping sauce with main courses dishes like rice, yellow dal, gravy veggies, and other dry veggies also. This chutney is prepared in a Punjabi style. 

A green coriander flavored chutney which is the great option for sandwich spreads also. It goes very well with south indian snacks too veggies uttapam, poha dosa, rava appe and idli too

Usually i make green chutneys and keep them in the fridge. They are very handy when you want to apply them to your toasts or breads or have them as a dip with some snacks.


if you are looking for more chutney recipes then do check tamarind chutney, coconut-tomato chutney, tomato-onion chutney. 

You can check my video of "Coriander Chutney" on YouTube

Let's start to make this easy and quick recipe of fresh coriander chutney with simple step-by-step process with photos.


Ingredients :

Freshly chopped Coriander Leaves - 1 cup
Roughly chopped Onions - 2 nos
Chopped green chillies - 1-2 nos
Salt to taste
Red Chili Powder - 1/4 tsp
Garam Masala Powder - 1/4 tsp
Lemon juice - 1 no


Note*- Adjust your spices according to your taste

Preparation Method :

1. For preparing coriander chutney, add chopped coriander leaves in a blender.


2. Add chopped onions, green chillies
now add spices - red chilly powder, garam masala powder, we added salt later into it and blend into a smooth paste, by adding a 1 to 2 tbsp of water.

3. Pour the coriander paste into a bowl, now add salt and lemon juice and Mix well. Just taste it, if you required more you can add otherwise leave it.


4. Store it into a container and keep it in a fridge.

5. Serve coriander chutney with your meal and
Oil-Free Bread Rolls in Appe Pan. 

Happy Cooking & Enjoy !!
Bread Rolls in Appe Pan with step by step recipe - I love bread rolls and sometimes I starved myself for a bread roll. But daily-daily having oily food is not a good idea, So when I get the some snacks carving ;) I try and get creative :):D

A few days ago, though, I decide to try something different and came up with my bread rolls in appe pan. The tastes just like same but this is oil-free, that is most healthy part in it. They are crunchy from outside and soft & spicy from inside.


The actual process of bread roll are prepared with bread, stuffed with spicy mashed potatoes and
finally deep fry it. But this time I made easy-peasy, crunchy Non fried version of Bread Cutlet ?? 

They are made in my trusty oil free Appe pan!! They turned out so perfect…almost oil-free…ideal for kids too! 

I have already tried and tested my two recipes in appe pan like Rava Appe (appe made with semolina based batter) and Vegetable Paniyaram(a south-indian snack made with idli-dosa batter)

The bread rolls are best served for breakfast or with evening tea as snacks along with coriander chutney or simply tomato ketchup. Pair this with a tea or coffee. 
Coriander Chutney
Me and my hubby loved them because this is the first time made a non-fried version of these bread rolls, No one can really know the difference. A must try for all ??

You can make end number of healthy recipes like
Chickpeas Salad
Purple Cabbage Paratha
Apple Cinnamon Smoothie with Toasted Almonds
and many-more.....

Let's start to make this easy and quick recipe with simple step-by-step process with photos.
 
Yield: 7-8 large cutlets


Ingredients :

Boiled and Mashed Potato - 1 cup
Finely Chopped Onion - 1 large
Few slice of bread (remove the sides)
Finely chopped green chilli - 1 no (optional)
Dry mango powder/ Amchur powder - 1/2 tbsp
Red chili powder - 1/2 tsp
Roasted cumin powder - 1/8 tsp
Garam Masala powder- 1/4 tsp
Salt to taste
Chopped Fresh coriander leaves
1-2 tsp oil to cook
Appe Pan

Preparation Method :

1. Mix all the above ingredients well in a mixing bowl except bread. Avoid lumps & don’t add any water. Set it in the refrigerator for 10-15 mins. The mixture will be easier to handle & shape when slightly cold.


2. Heat the Appe pan alongside and add a few drops of oil in each indentation. The pan should nicely heated, if not the cutlet]s won’t be crunchy.


3. Now, cut the hard sides off the bread slices, take some water in a wide bowl,

Carefully immerse a slice of bread in the water bath for just a second or two, remove and keep the bread slice flat on one palm and press softly with the other palm to strain out all the water from the bread carefully without letting it crumble.

4. Leave the slice of bread still on you one palm and place 1/2 tablespoon of the potato mixture on the center of the bread slice, 
carefully fold in all the four ends over and slowly roll into a croquette using both the hands, softly apply a little pressure as you work through so that if there is still any excess water in the bread it is released off. 

5. Repeat with other slices and make all the rolls.

6. Place it in an indentation of the Appe pan. Repeat the same steps for the other balls too. Cook on each side for about 3-4 mins to get an even color & crunch. You can add a few more drops of oil if required. 


7. Once done, serve them piping hot with some ketchup or green chutney.

Happy Cooking & Enjoy !!
Achari Chana Pulao recipe step by step photos - It is one-pot meal recipe of chana pulao which is spiced with mango pickle. So aromatic and delicious rice recipe.

Pulao are always simple and quick fuss free recipe to prepare on busy days and sometimes when you are lazy to prepare full meal. 


This veg pulao variety has achaar and chana added to it in a rice, which makes it slightly spicy, tangy and more flavorful.

Trust me, this is really super yummy rice dish and tastes wonderfully and no one would believe it has achaar in it ;). My husband especially was pleasantly surprised. :D 


I love fusion in my recipes and want to try something new and unique in rice variety :P LOL So I made this achari pulao using with boiled kabuli white chana with aromatic dry herbs and spices..no other veggies is there. 


Earlier, I have used pickle in my paratha named "Achaari Paratha" in this I used pachranga achaar but in pulao used Mother's Mango Pickle, you can use any variety of pickle. 

Go on, take out your pressure cookers today and try this super simple pulao for your meals.

I am sharing an easy recipe of pickled chana pulao made in a pressure cooker with step by step photos. 


Today, it's our Foodie Monday Bloghop challenge theme and it's such a easy-peasy theme this time called "#Rice", means you need to prepared any sweet or salty or flavored rice recipe. 

So I made this fusion flavorful tangy rice recipe, hope all my readers liked it :)

You can make end number of rice varieties like...


Tawa pulao
Lemon rice
Zarda pulao
Simple Veggie biryani
Curd Rice
Tomato Pulao

Let's start to make this flavorful and tangy achari chana pulao recipe with simple step-by-step process.


Preparation Time: 15 mins
Cooking Time: 15 mins
Makes : 3 servings

Ingredients :

Aam ka achar/ Mango Pickle - 2 tbsp (you can take any choice of your pickle)
Soaked and boiled kabuli chana (white chick peas) - 1/2 cup
Long grained rice (basmati) - 1 cup

Pinch of heeng
Sliced Onions - 1 large sized
Ginger-garlic paste - 1/2 tsp
Turmeric powder / haldi - 1/2 tsp
Chili powder - 1/2 tsp
Garam masala - 1/2 tsp
Salt to taste
Melted ghee - 2 tbsp
Water - 2 cups
For The Garnish - 2 tbsp chopped coriander (dhania)


Aromatic Dry Herbs

Bay leaves - 2 no
Star anise - 2
Fennel seeds / saunf - 3/4 tsp
Mustard seeds / rai / sarson - 3/4 tsp
Nigella seeds / kalonji - 3/4 tsp
Cinnamon stick - 1/2 inch
Black cardamom / badi elaichi - 1
Cumin seeds / jeera - 3/4 tsp

 
Preparation Method :

1. Clean, wash and soak the rice for 15 minutes. Drain and keep aside.


2. Heat the ghee in a pressure cooker, add the bay leaves, fennel seeds, mustard seeds, nigella seeds, big cardamom, cumin seeds and asafoetida and saute on a medium flame for a few seconds.


3. When the seeds crackle, add the onions and saute on a medium flame for 1 to 2 minutes saute till translucent.


4. Add the ginger-garlic paste, saute till the raw smell disappears.

5. Now add the boiled kabuli chana, turmeric powder, chilli powder, garam masala, salt and the prepared pickle paste, mix well and cook on a medium flame for 1 minute.


6. Add the rice, mix well and cook on a medium flame for 1 minute.


7. Add the 2 cups of water, mix well and pressure cook for 2 whistles.


8. Allow the steam to escape before opening the lid.

Prestige Pressure Cooker
9. Fluff with a fork when its done.

10. Serve hot garnished with coriander.


PIN IT Later for future use

Happy Cooking and Enjoy !!
Newer Posts Older Posts Home

Page views

About Me

About Me
Hello. I'm Jolly Makkar, a food blogger, a mommy of 1 son and nature lover. Thank you for stopping by! Welcome to my Food Blog.

my favorite recipes

  • JollyHomemadeRecipes
  • JollyHomemadeRecipes

Featured Post

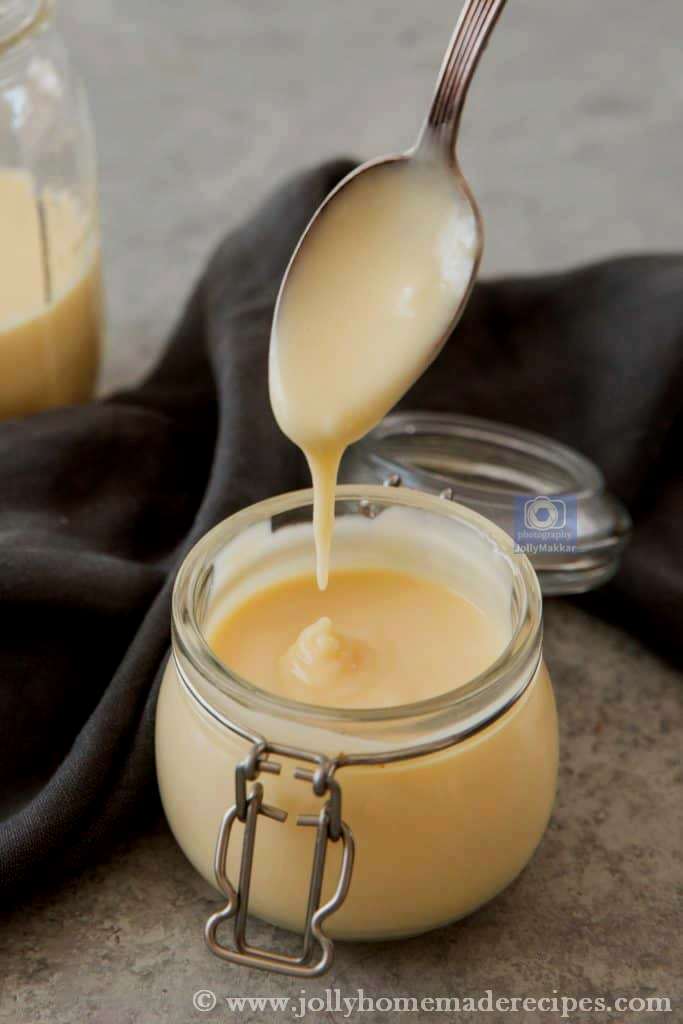
Homemade Condensed Milk Recipe | How to make Condensed Milk at Home | 3 Ingredients Condensed Milk(Video Recipe)

SUBSCRIBE & FOLLOW

POPULAR POSTS

  • Cinnamon Sugar Bread Crust Treats, Leftover Cinnamon Sugar Breadsticks Recipe
  • Meethi Seviyan without Milk | Dry Sweet Vermicelli | Meethi Sewai Recipe
  • Aloo Tamatar ki Sukhi Sabzi | Potato Tomato Stir Fry | Aloo Tamatar Ki Sabji
  • Rava Cake | How to make Sooji Atta Cake | Semolina Cake(Eggless)
  • Vatana Batata Nu Shak | Gujarati Aloo Matar ki Sabji | Matar Aloo Curry
  • Watermelon Granita | Easy 3 Ingredients Watermelon Granita
  • Shahi Phirni | How to make Best Phirni Recipe | Indian Royal Rice Pudding
  • Sooji Halwa Recipe, How to make Sooji ka Halwa - Ashtami Prasad | Indian Style Slow Cook Semolina Pudding
  • Urad Dal Ke Pakode | How to make Urad Dal Pakoda | Lentil Fritters
  • Homemade Condensed Milk Recipe | How to make Condensed Milk at Home | 3 Ingredients Condensed Milk(Video Recipe)

Search This Blog

Categories

  • 15 Minutes Recipes 39
  • A to Z Recipe Challenge 31
  • Bachelor Recipes 64
  • Collaboration 1
  • Curries & Lentils 26
  • Drinks & Beverages 47
  • Festival Recipes 55
  • Indian Breads & Parathas 25
  • International Cuisine 51
  • Kids Recipes 120
  • Navratri & Fasting Recipes 8
  • North-Indian Recipes 36
  • Pancake Recipes 12
  • Popular Indian Recipes 80
  • Tiffin Recipes 34
  • breakfast 101
  • sweets 55
  • vegan recipes 85
  • vegetarian 104

Blog Archive

Pinterest

Visit JollyHomemadeRecipes's profile on Pinterest.

Contact Form

Name

Email *

Message *

Powered by Blogger.
Protected by Copyscape Creative Commons License
This work is licensed under a Creative Commons Attribution-NonCommercial 4.0 International License

Copyright © ; Homemade Recipes. Designed by OddThemes | Distributed By Gooyaabi Template